Mounting Ski Bindings with a 3D Printer
Background
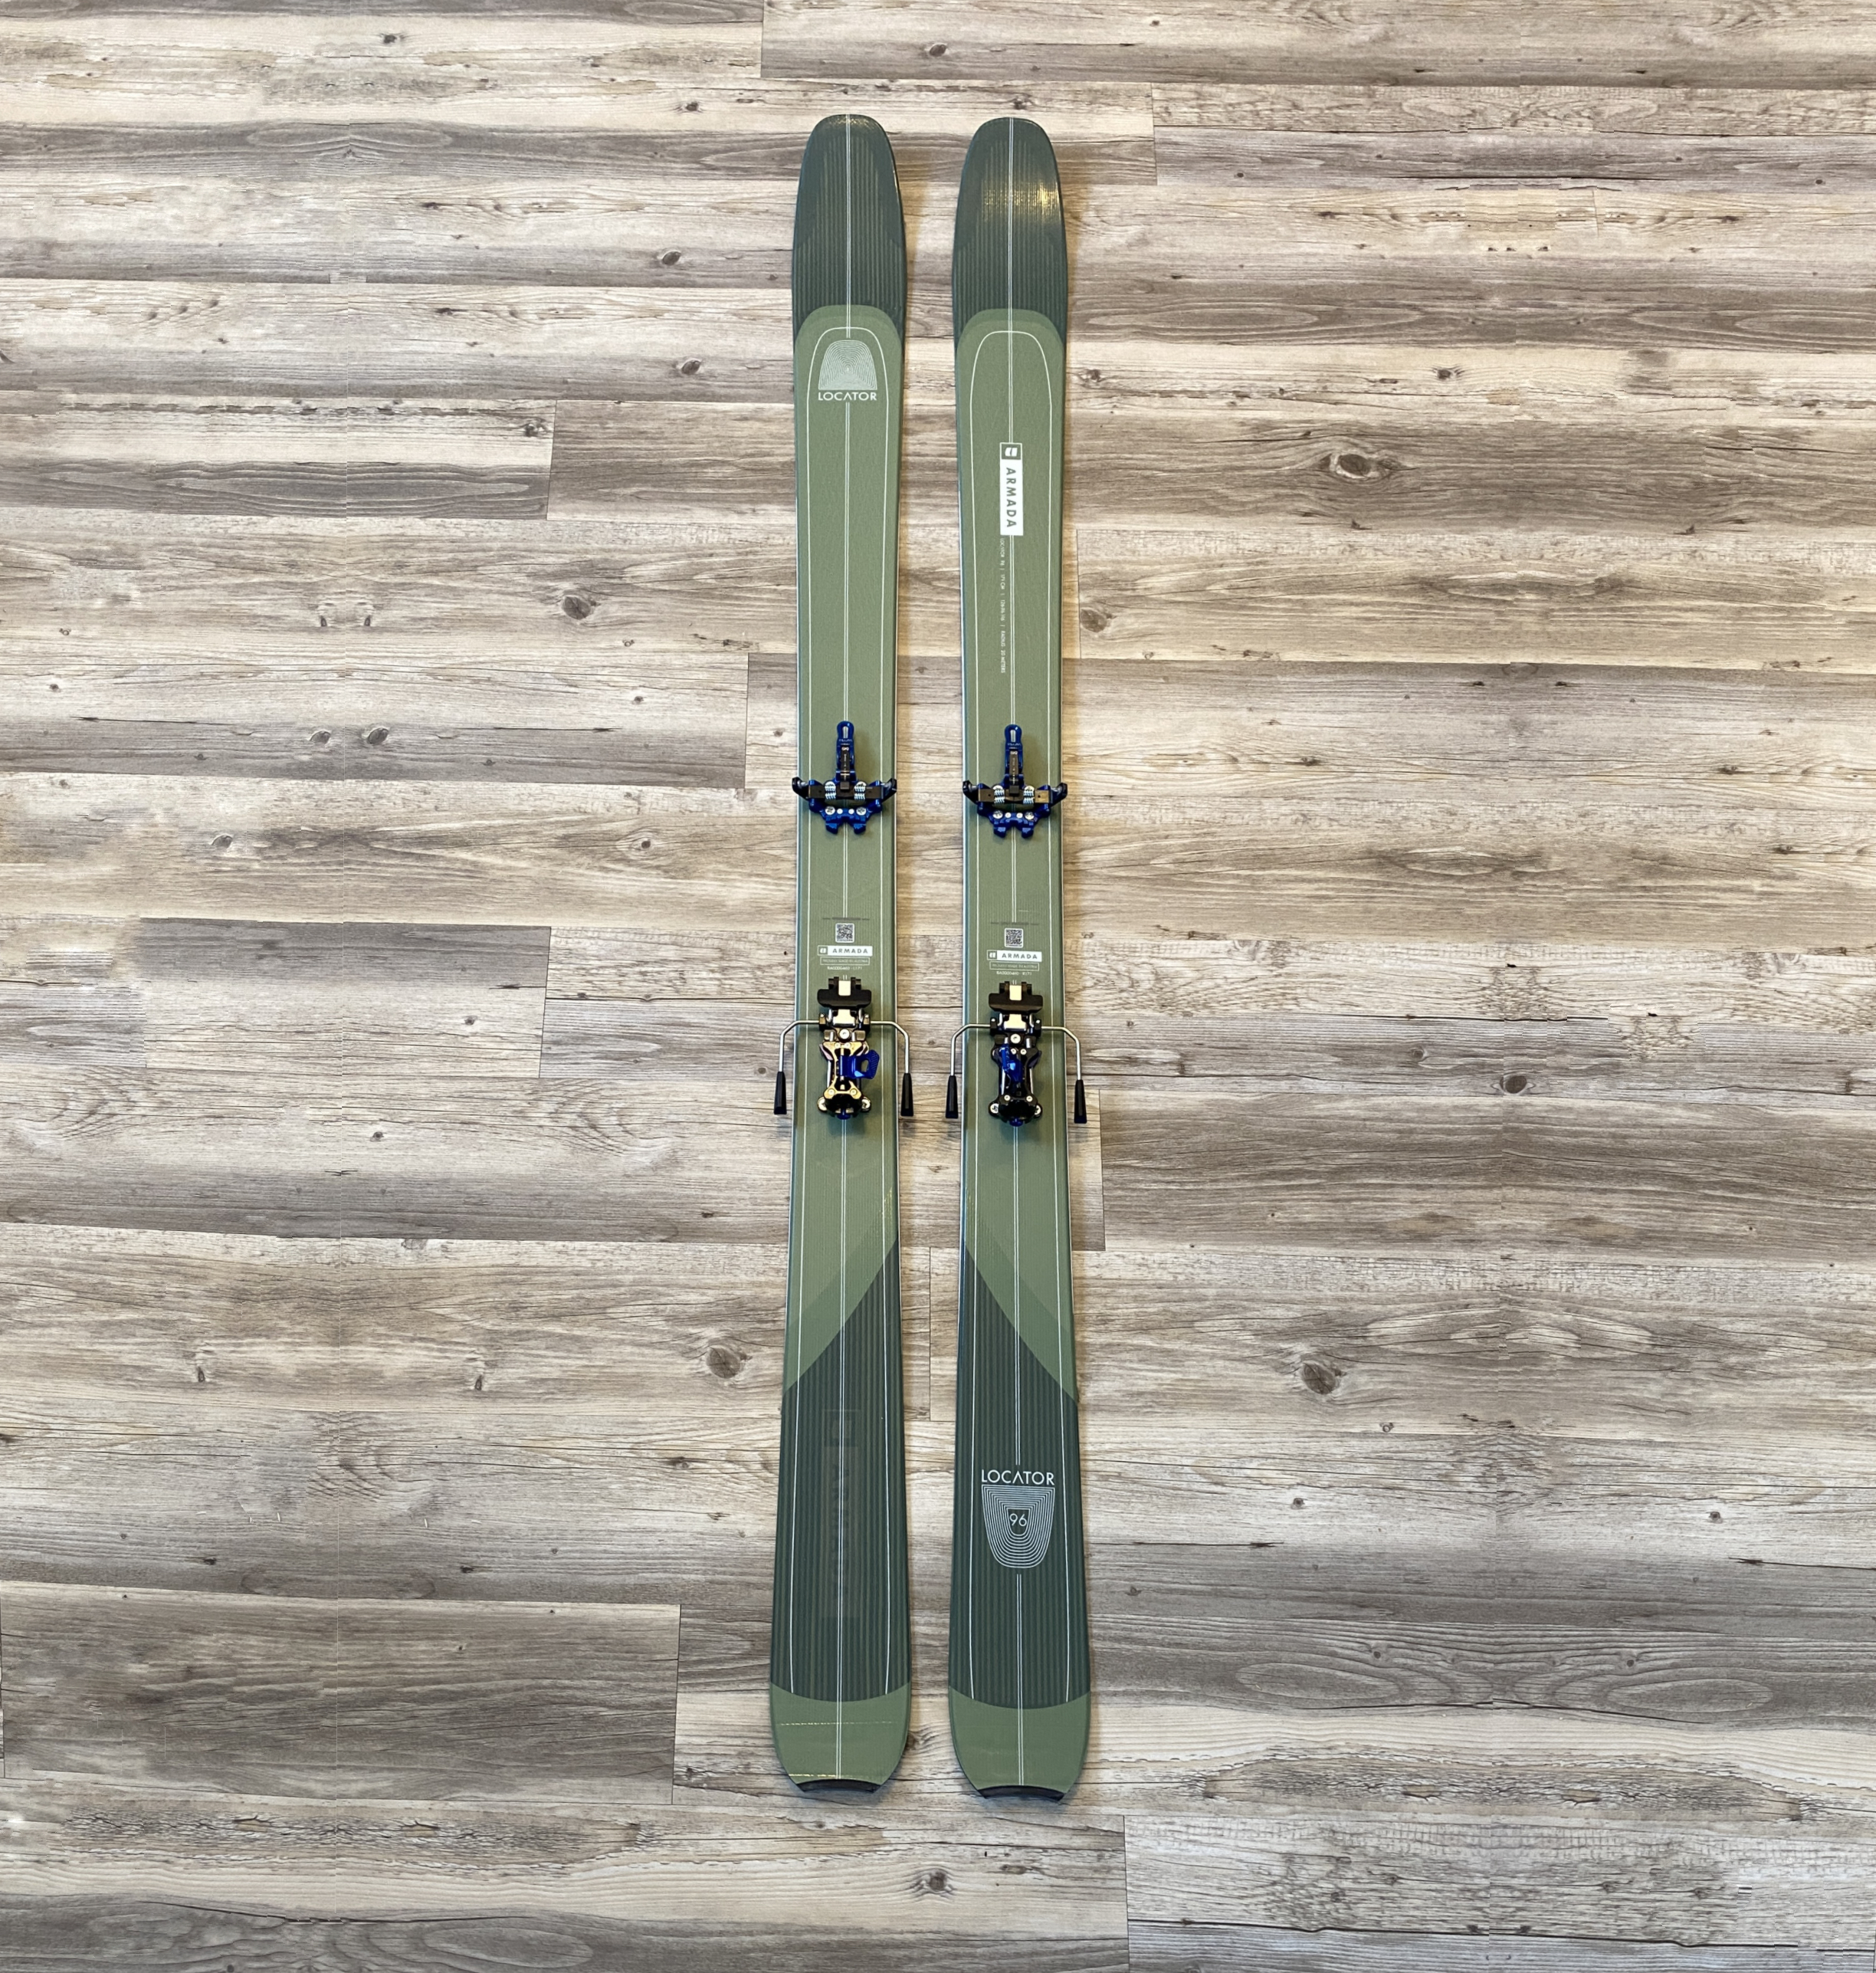
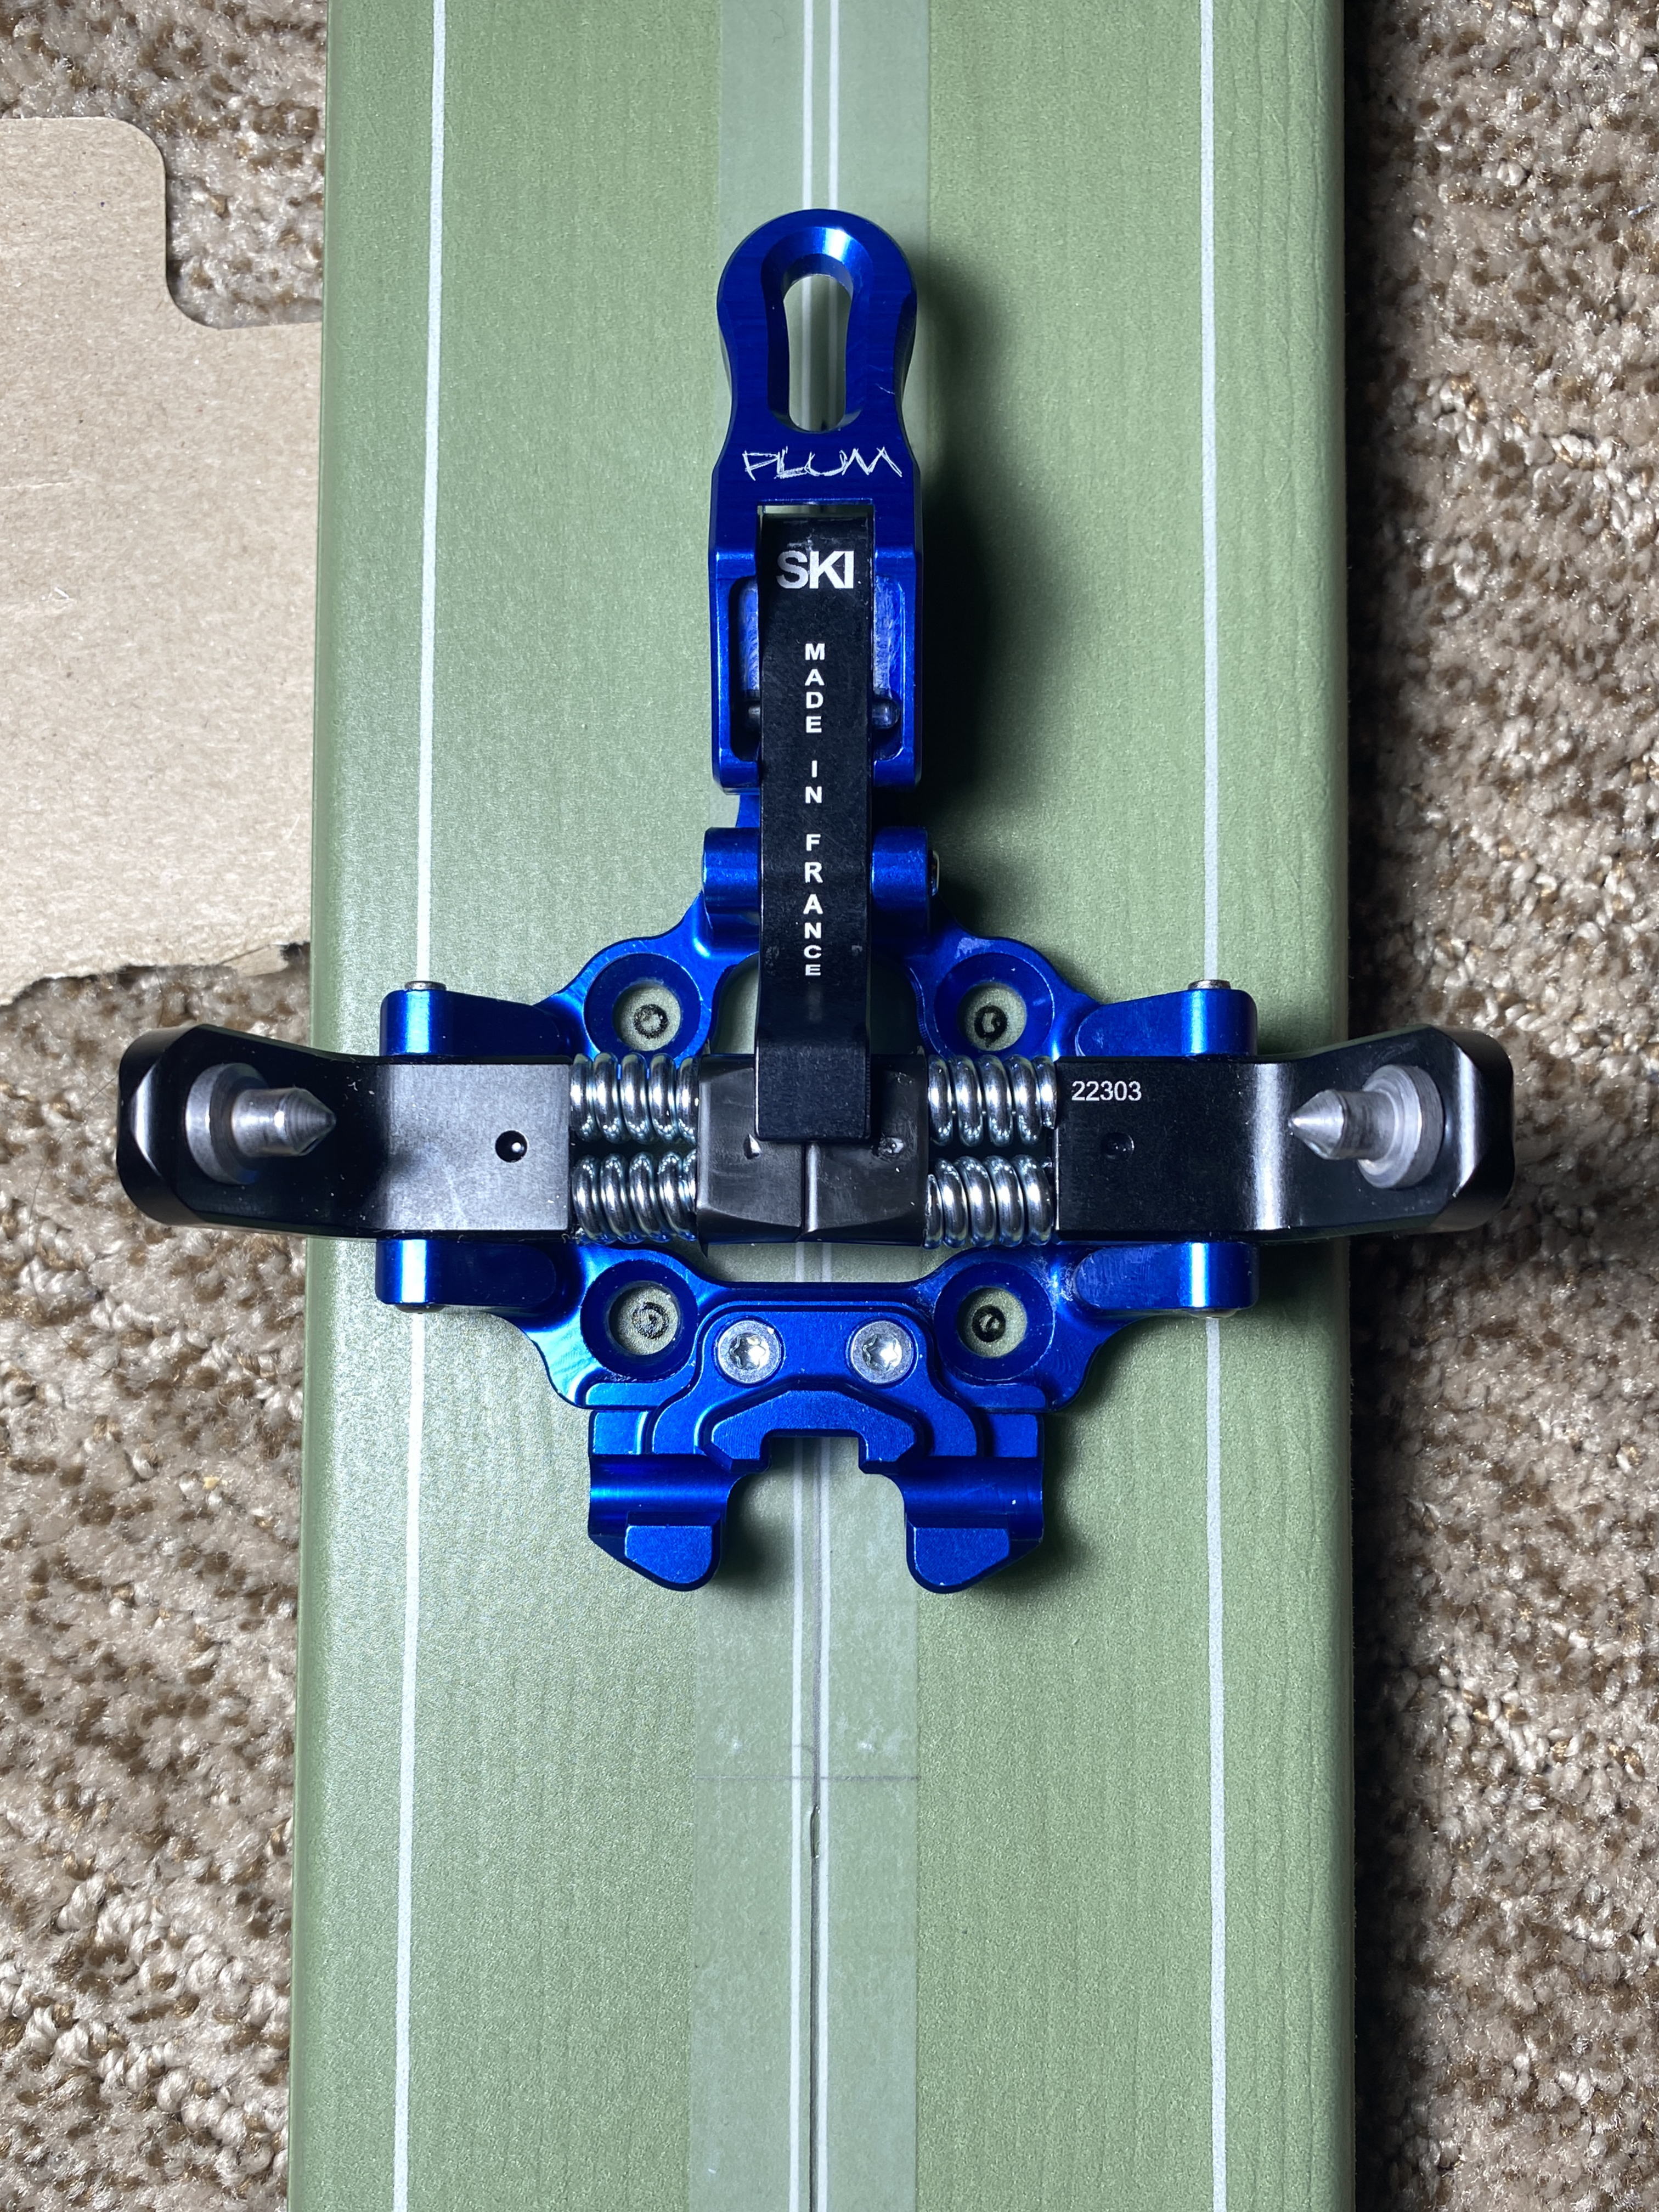
In an effort to save some money after purchasing backcountry ski gear, I decided to mount the somewhat unique ski bindings (Plum Pika) on the skis (Armada Locator 96) myself, as opposed to paying >$100 and waiting multiple days as would be required by a shop to mount these bindings.
Disclaimer: obviously, only mount your own skis if you are confident in your abilities to complete the mount correctly. Improper mounting could impact the integrity of your ski and bindings which could be disastrous, particularly in the backcountry. I am in no way a ski technician, so the steps below are only a guide. Further, what worked for my skis may not work for a different pair. If in any doubt, go with a shop.
For this process I used entirely tools I had at home, apart from some J-B Weld MarineWeld epoxy that I had to purchase for around $10. The full list of tools used was:
- 3D printer,
- Woodworking clamps,
- Drill,
- General purpose drill bits (9/64”, 5/32”, and larger size for countersinking),
- Ruler (and preferably calipers),
- Pozidriv #3 screwdriver,
- Marine epoxy (J-B MarineWeld),
- Scotch tape,
- Pencil, and
- Fine tip marker.
The 3D printer was used to print a jig to align my drill holes, and while this may not be common to own, it is not strictly necessary for a home mount if you are prepared to measure extremely carefully with a paper template. Installation guides for such a process can be found elsewhere online, but the process seemed more risky than it was worth to me, hence I put my 3D printer to use.
Before actually drilling any holes in your skis, I would strongly recommend going through the entire mounting process (minus the epoxy) on a scrap two-by-four to ensure that your drill template/jig correctly matches your bindings, and you can step into the bindings with your boots.
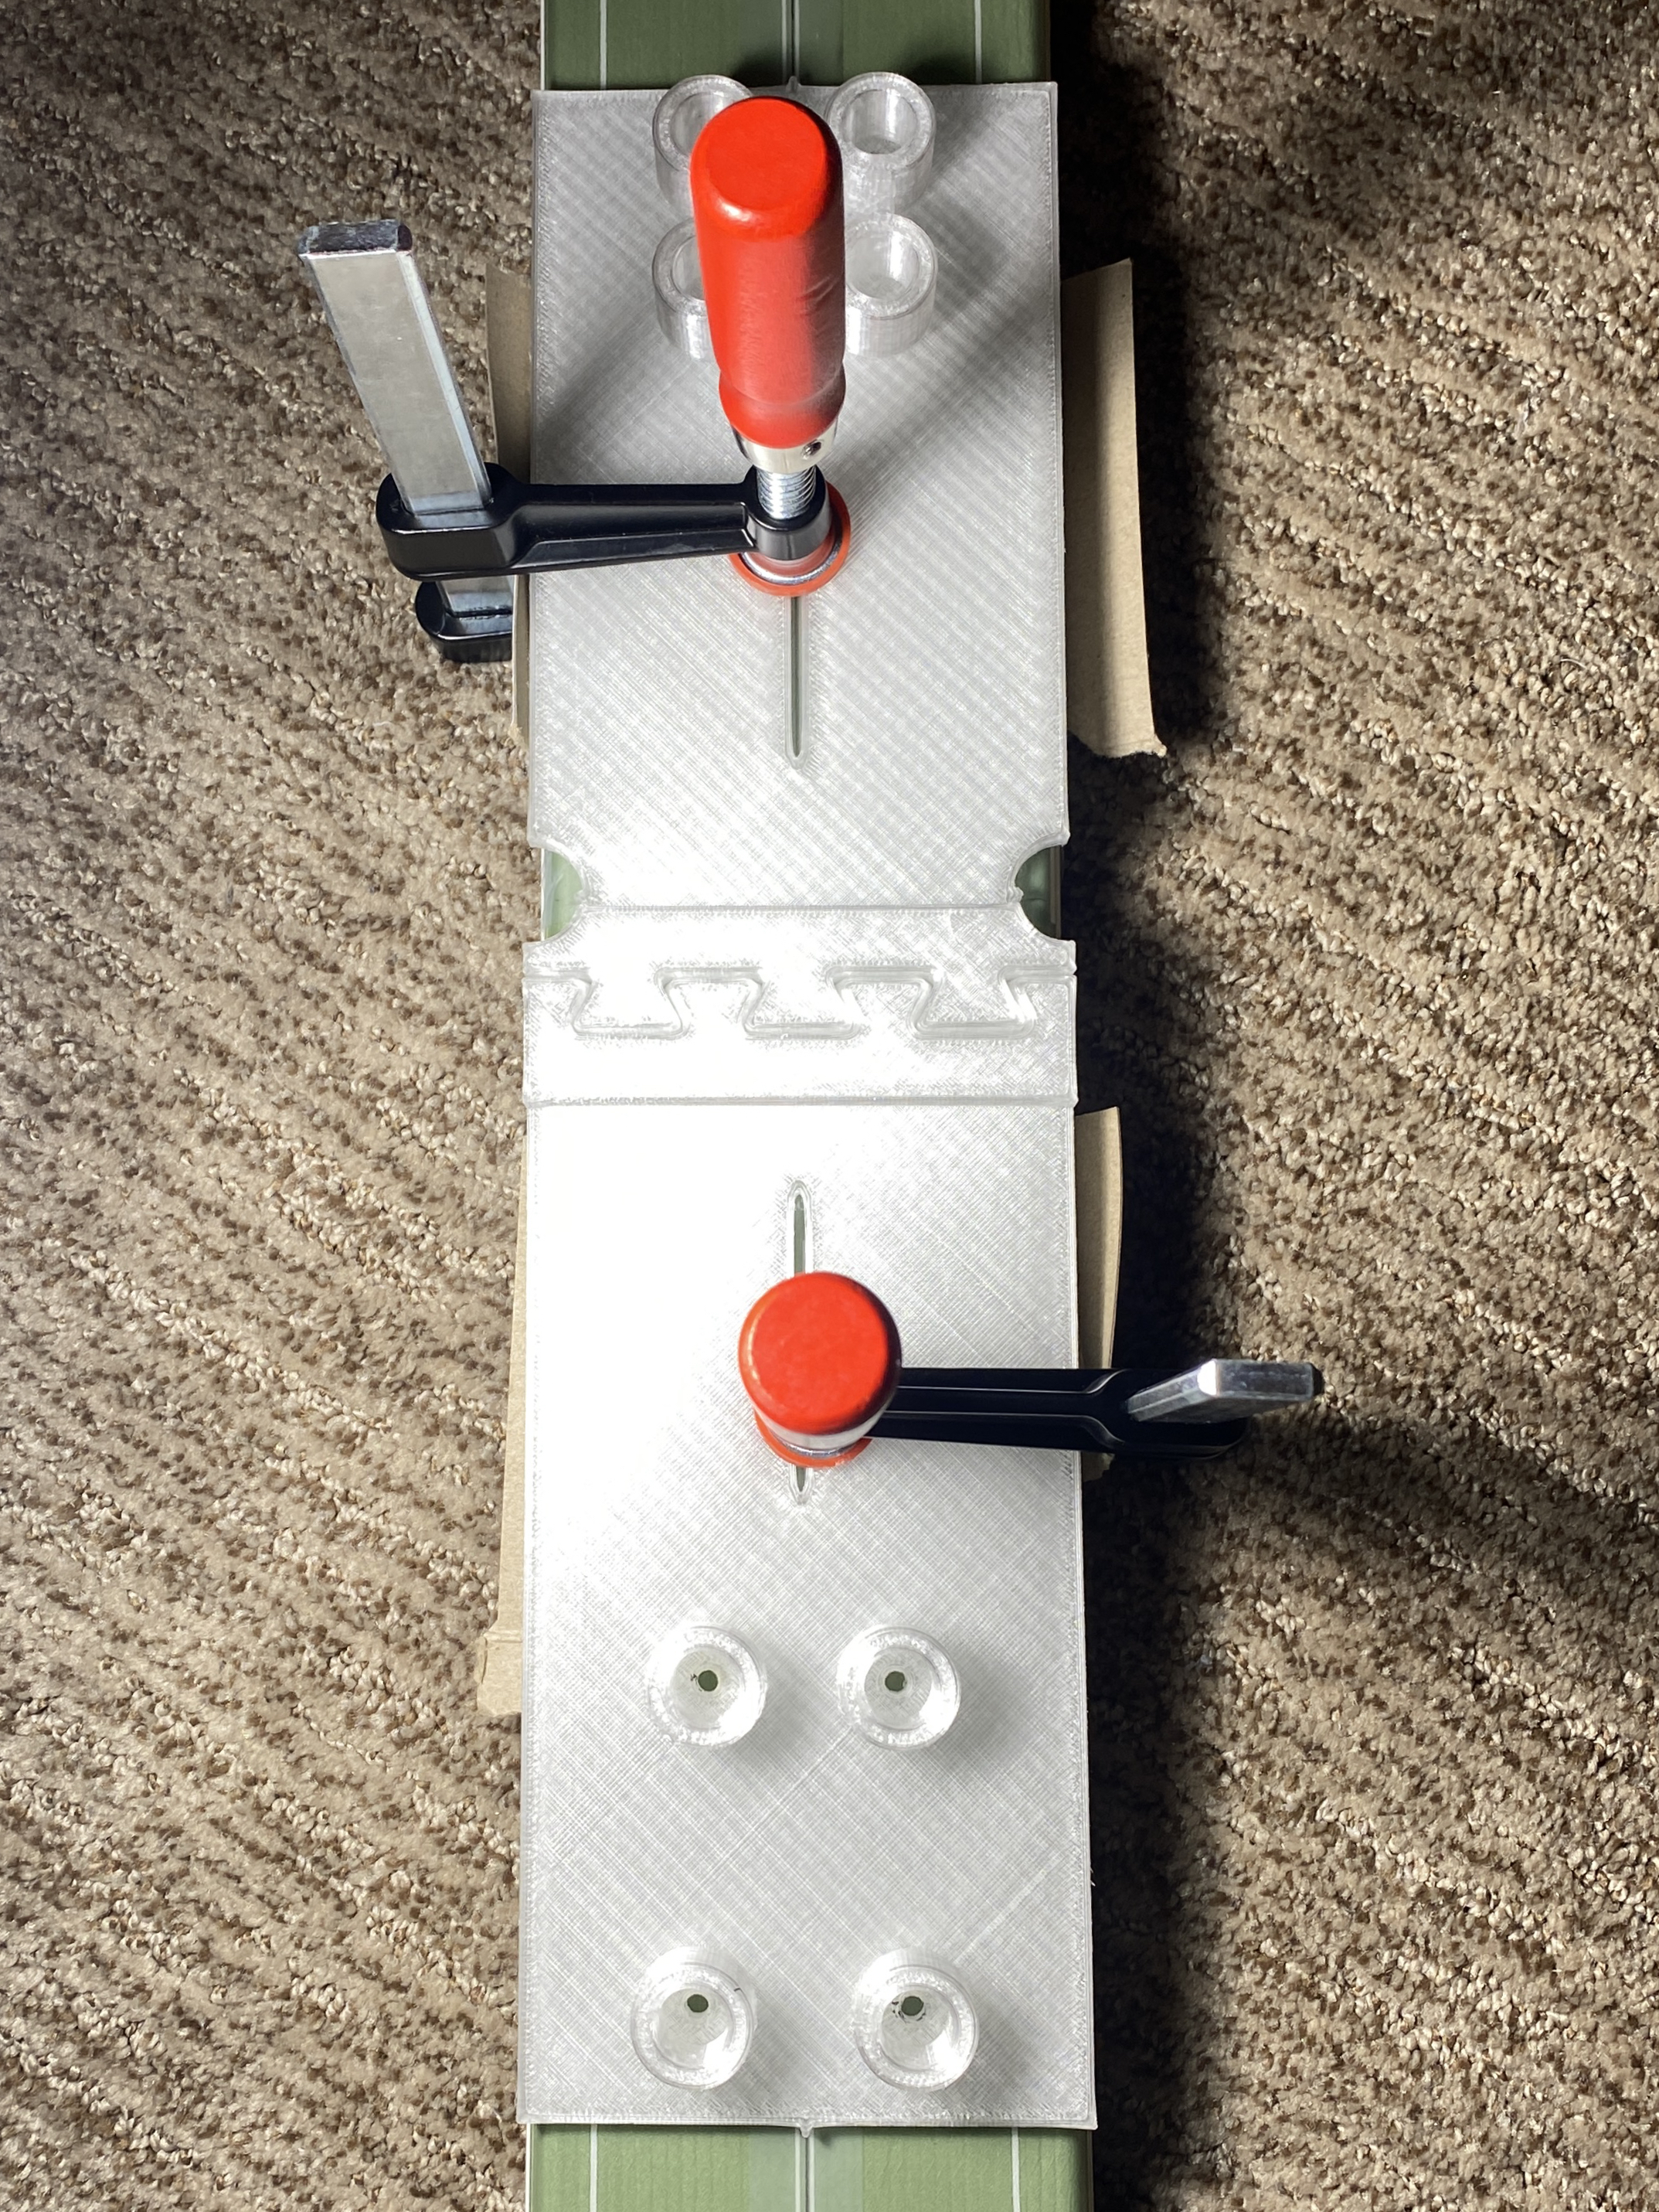
Binding Jig Model
To begin, I used CAD software to design the jig that I would eventually 3D print. I imported the PDF of the paper mounting template into the CAD software and lined up the two pages of the template such that the template would work with my ski boot length (which was printed on the base of the boot). I contacted the ski manufacturer for the drill depth and diameter which were 9.5 mm and 4.1 mm, respectively, which was needed to design the model. Sometimes this hole information will be printed on the top or side of the ski, but not in my case.
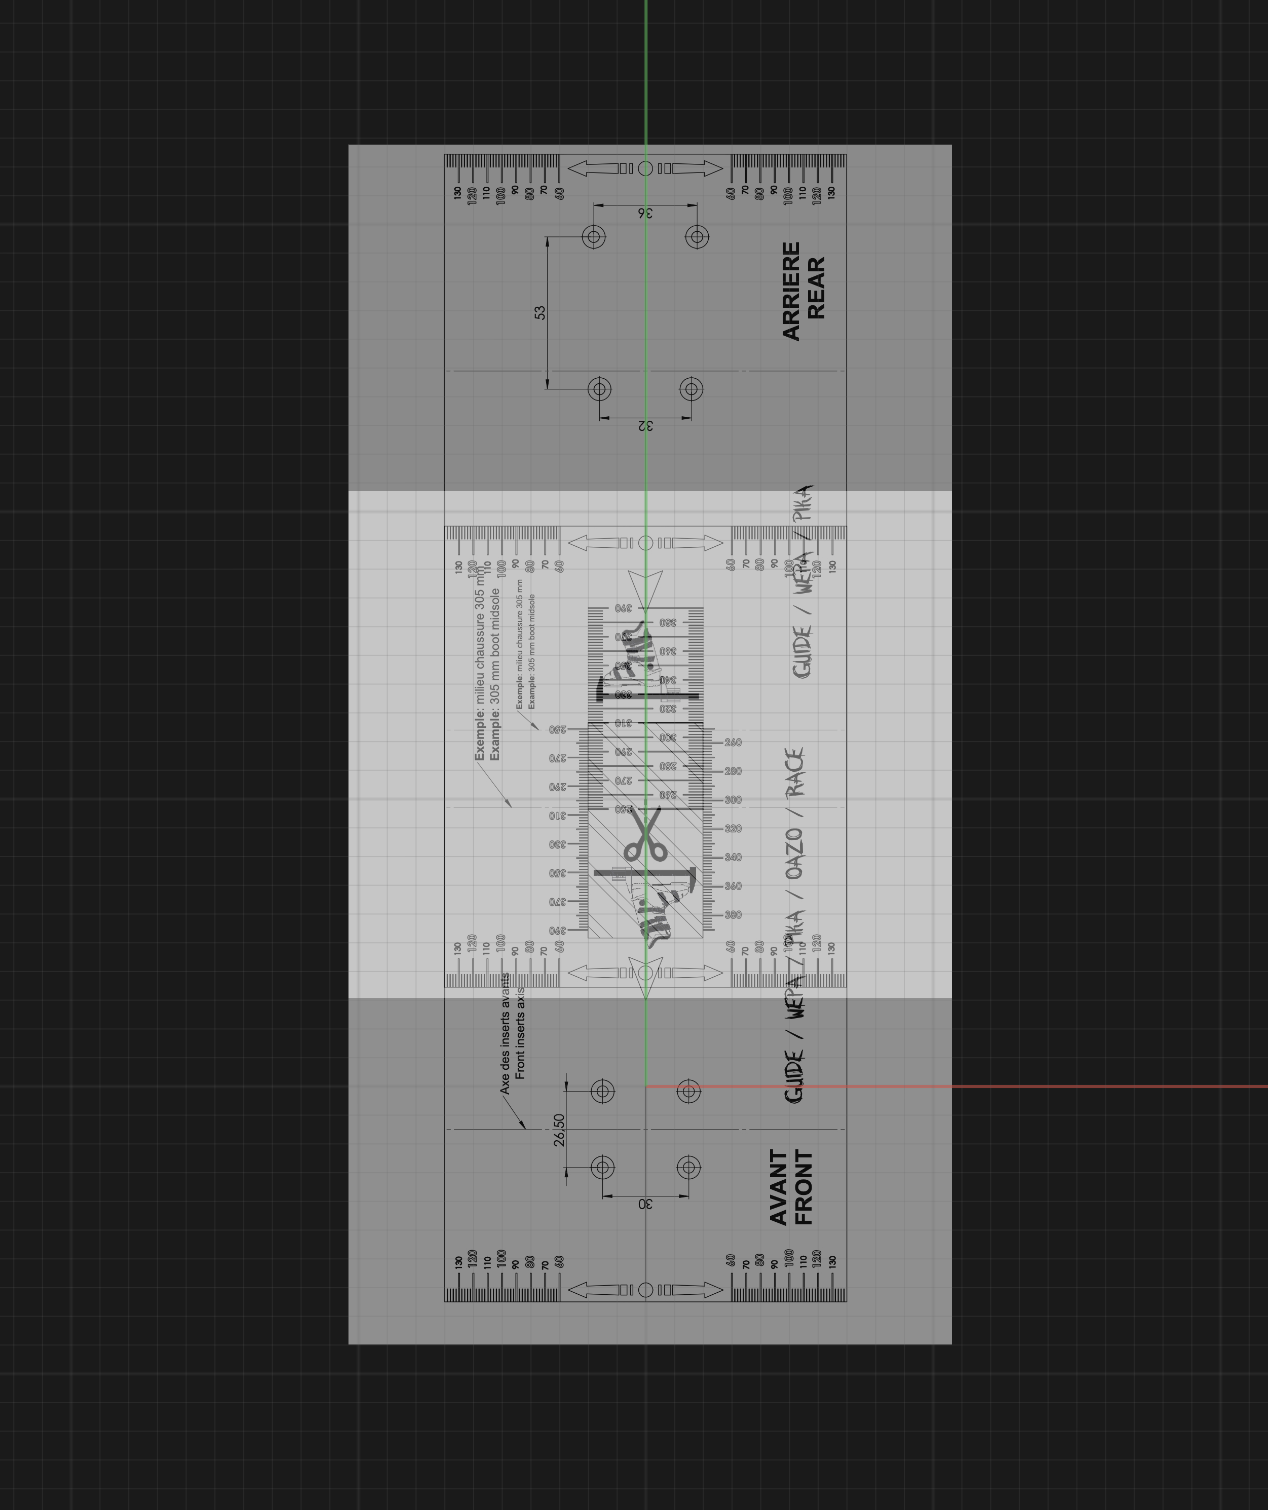
I then extruded a model with mounting holes at the correct spot as dictated by the template. The model actually consists of two separate pieces, necessitated by the size of my 3D printer bed. I used a “puzzle-piece” style connection, with the connector on one of the pieces slightly sloped. This allowed the two pieces to be slid together and hammered into place, creating a strong pressure fit.
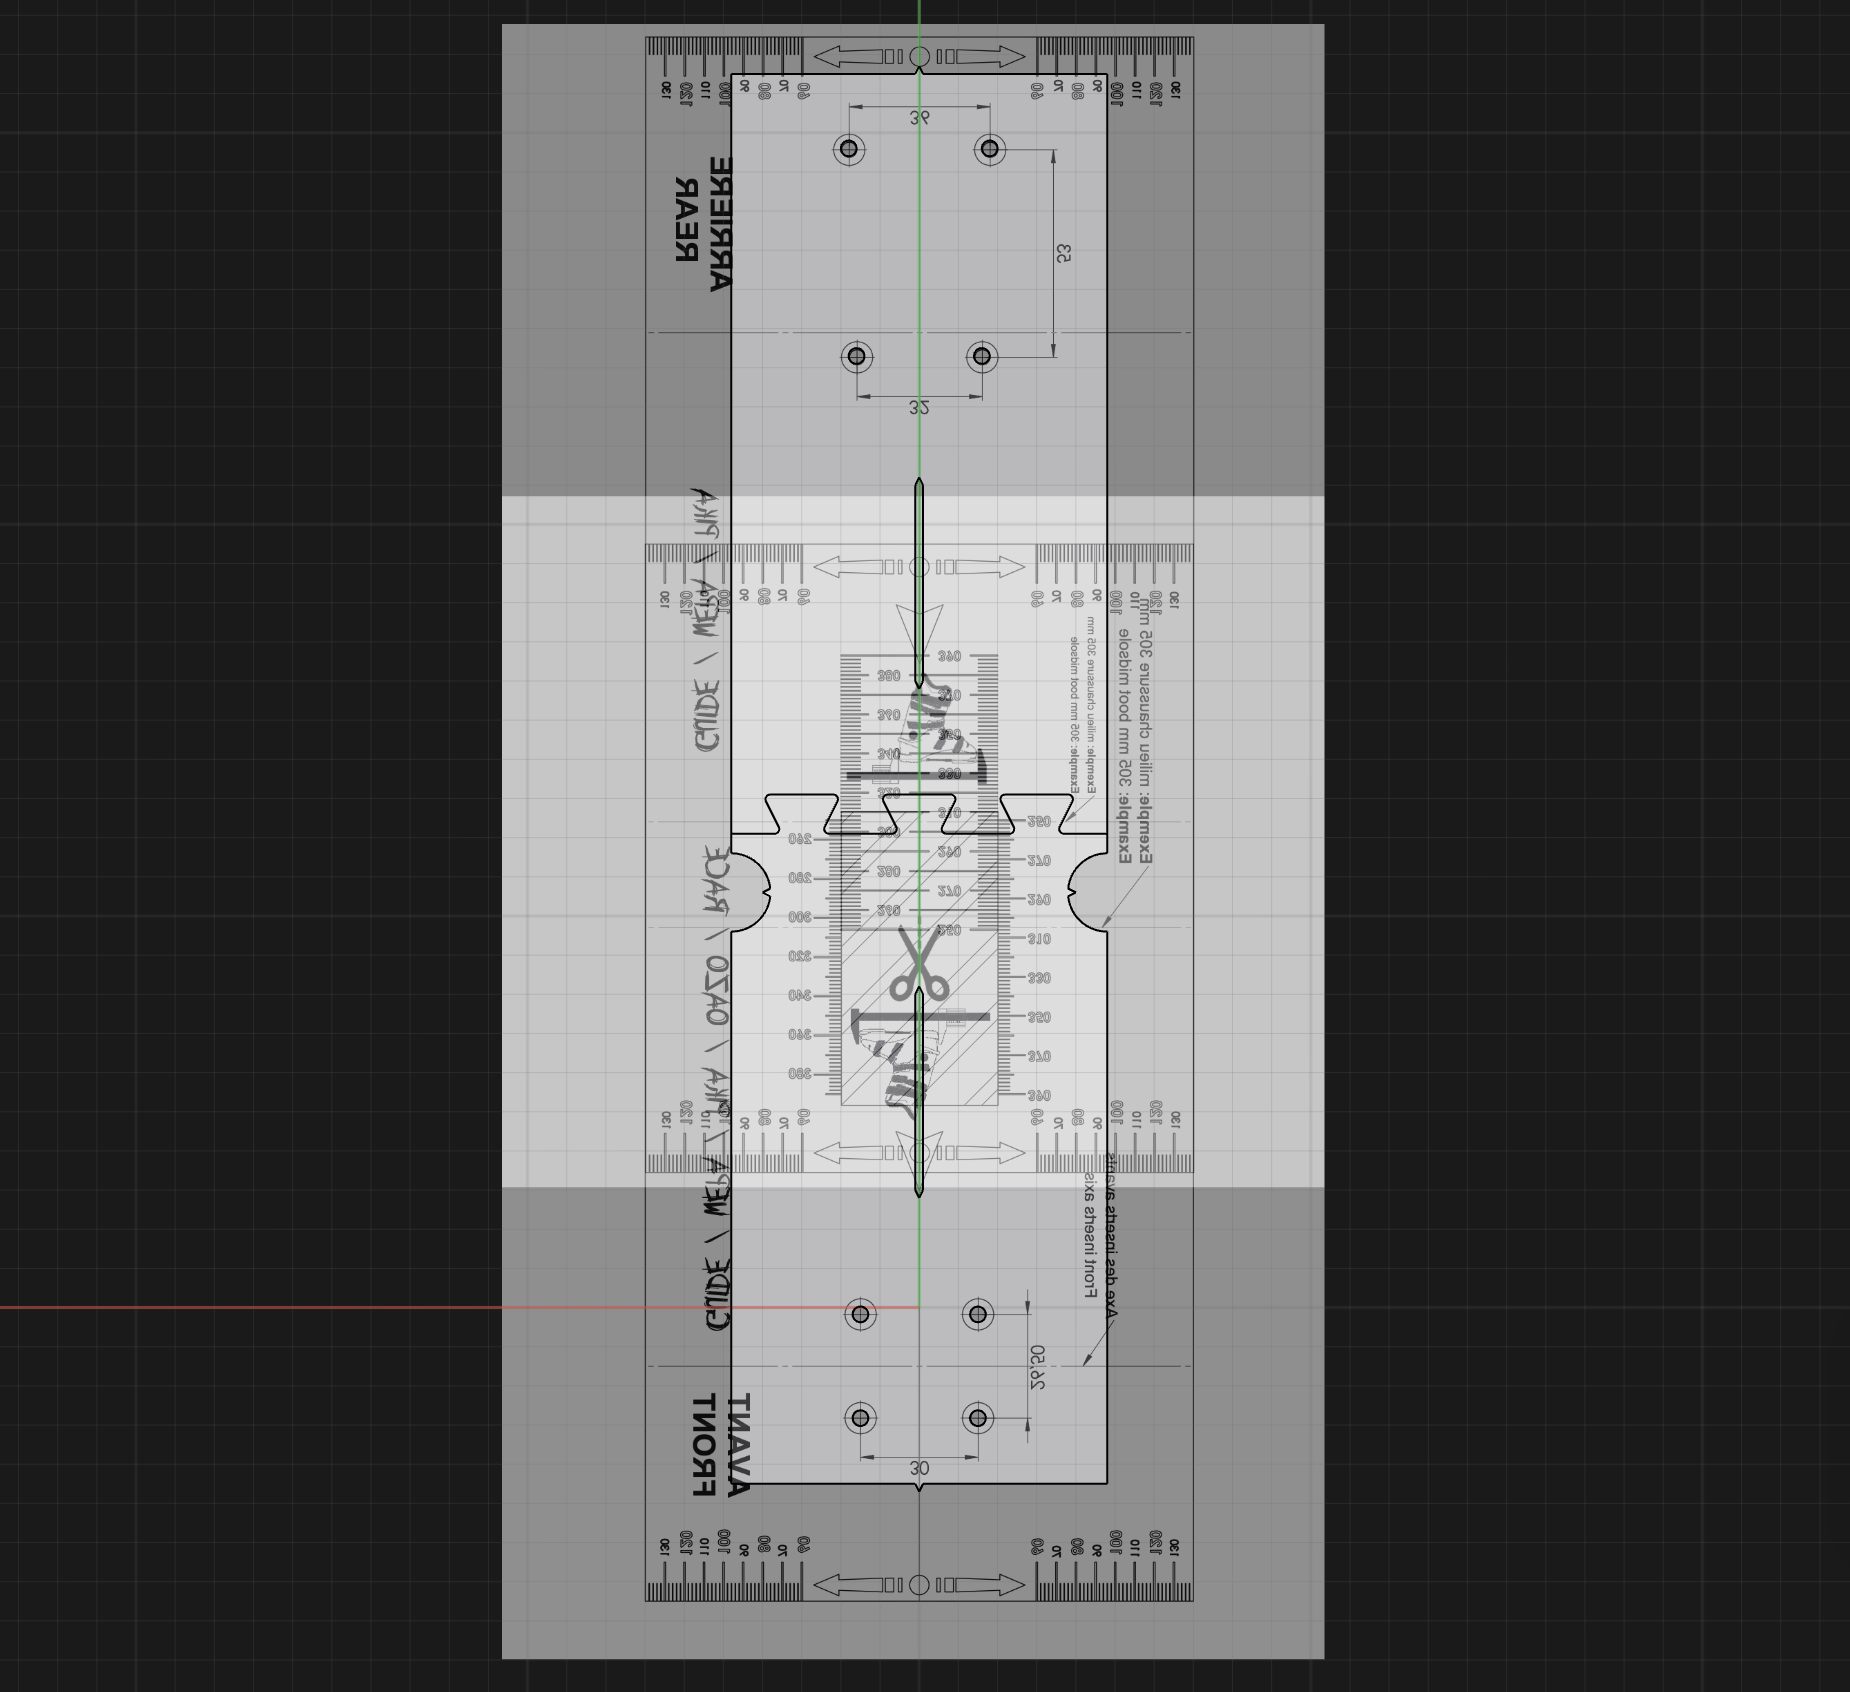
Around each of the 4.1 mm mount holes, I extruded a larger ring enclosure, with the idea being you would place a 3D printed cylindrical depth-stop of a particular height around the drill bit such that the drill bit could only ever drill 9.5 mm below the jig into the ski. This would ensure the correct depth was always drilled, and you would never punch through the bottom of the ski with the drill bit. In addition, the ring enclosure creates a guide to ensure that the hole is drilled nearly perfectly vertical. For the depth-stop parts, I chamfered one edge so that there was room for shavings to go as material is drilled.
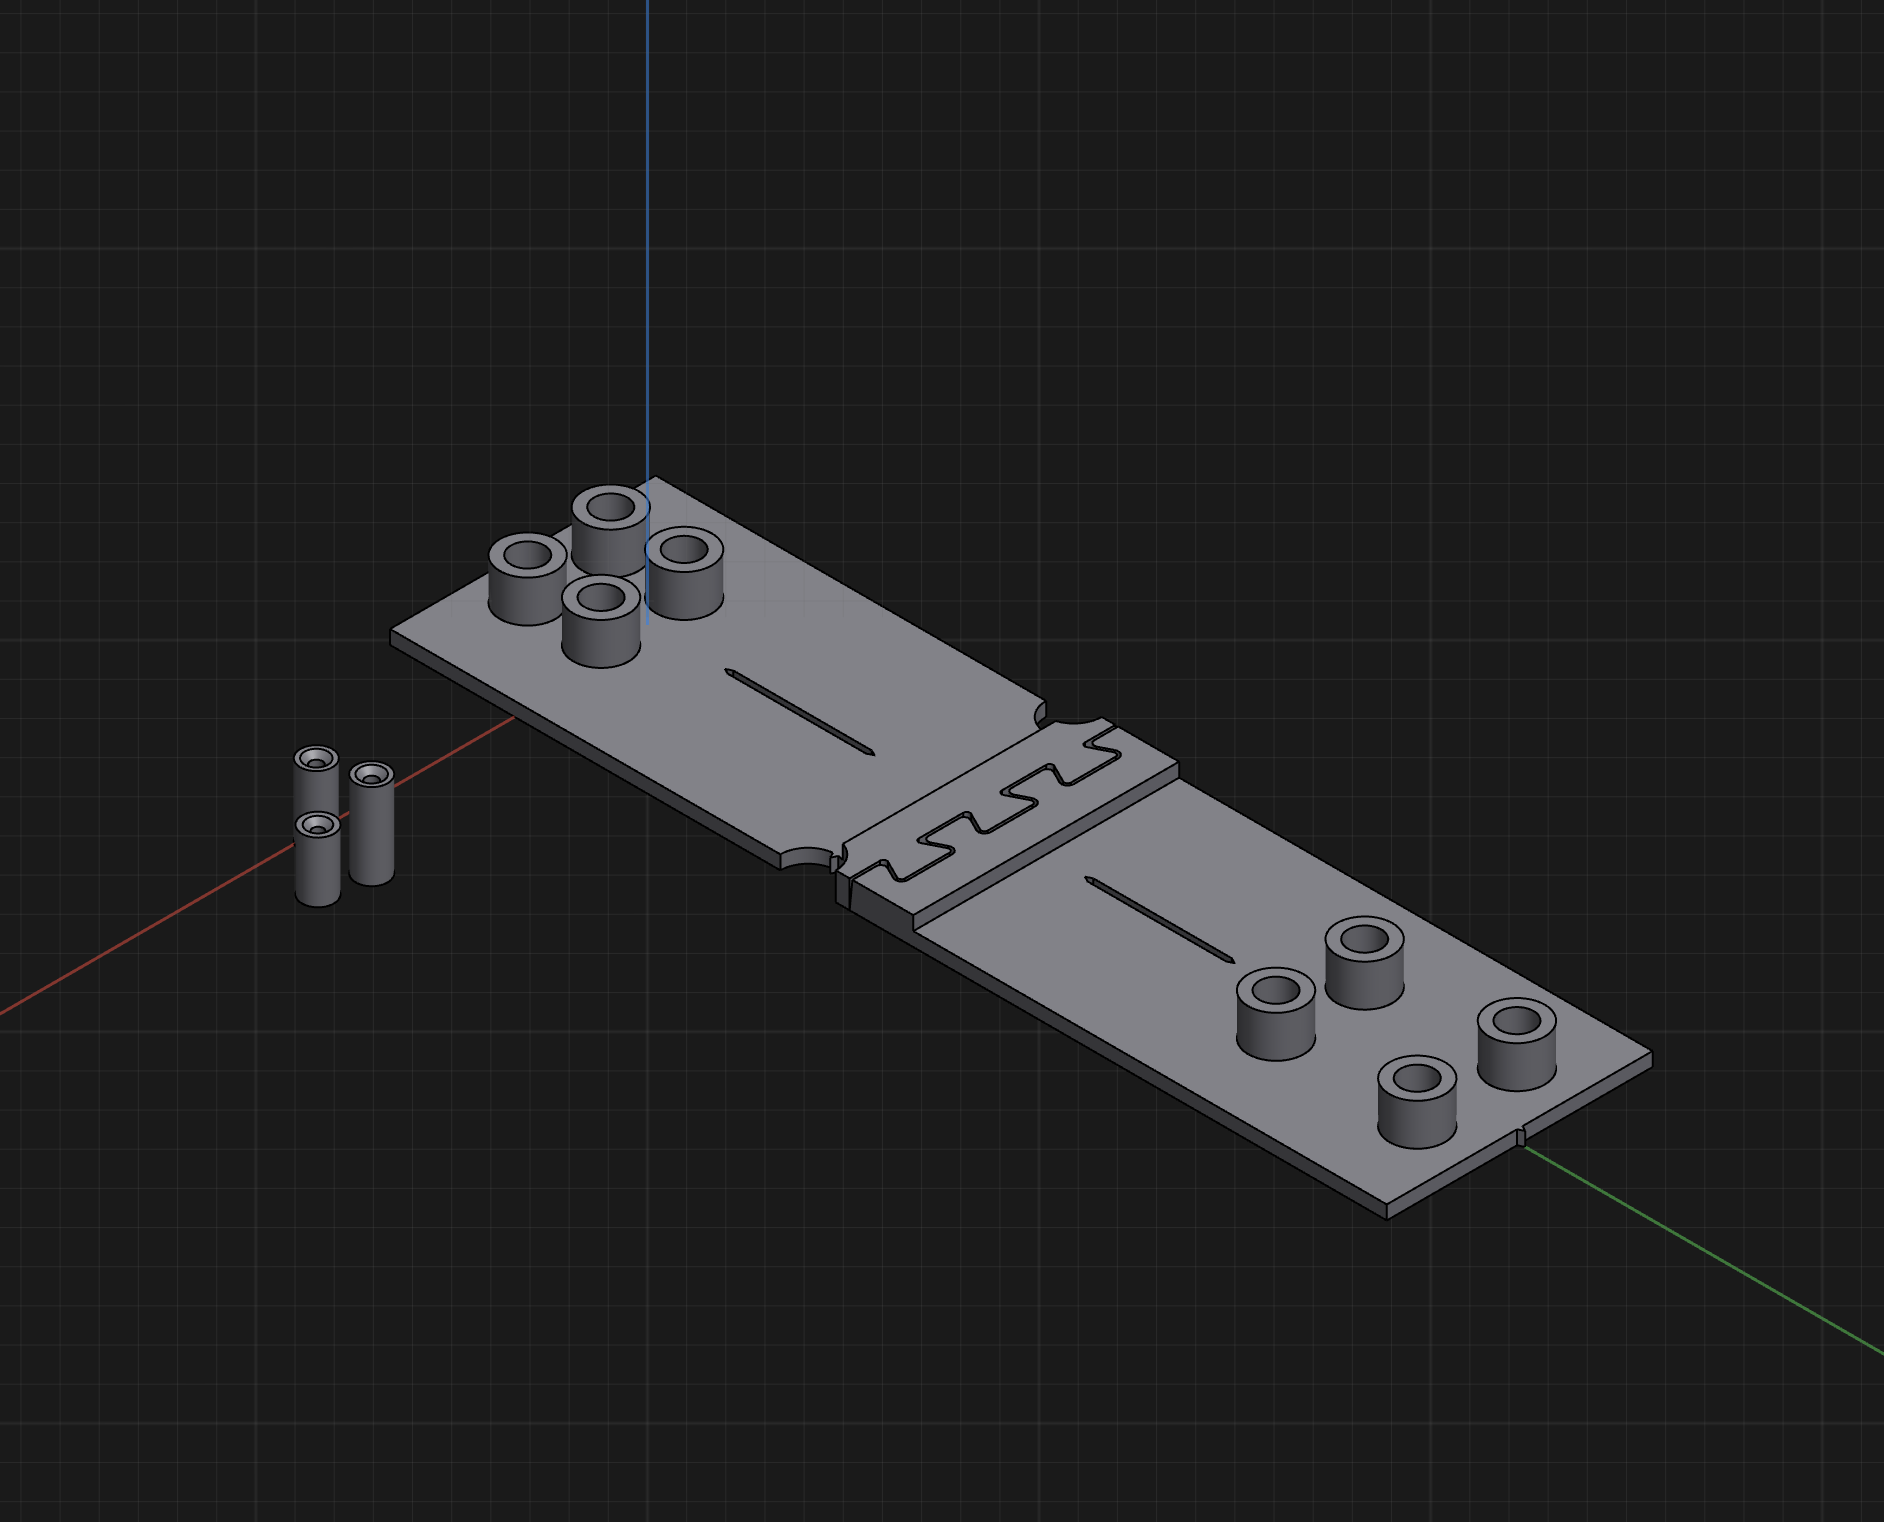
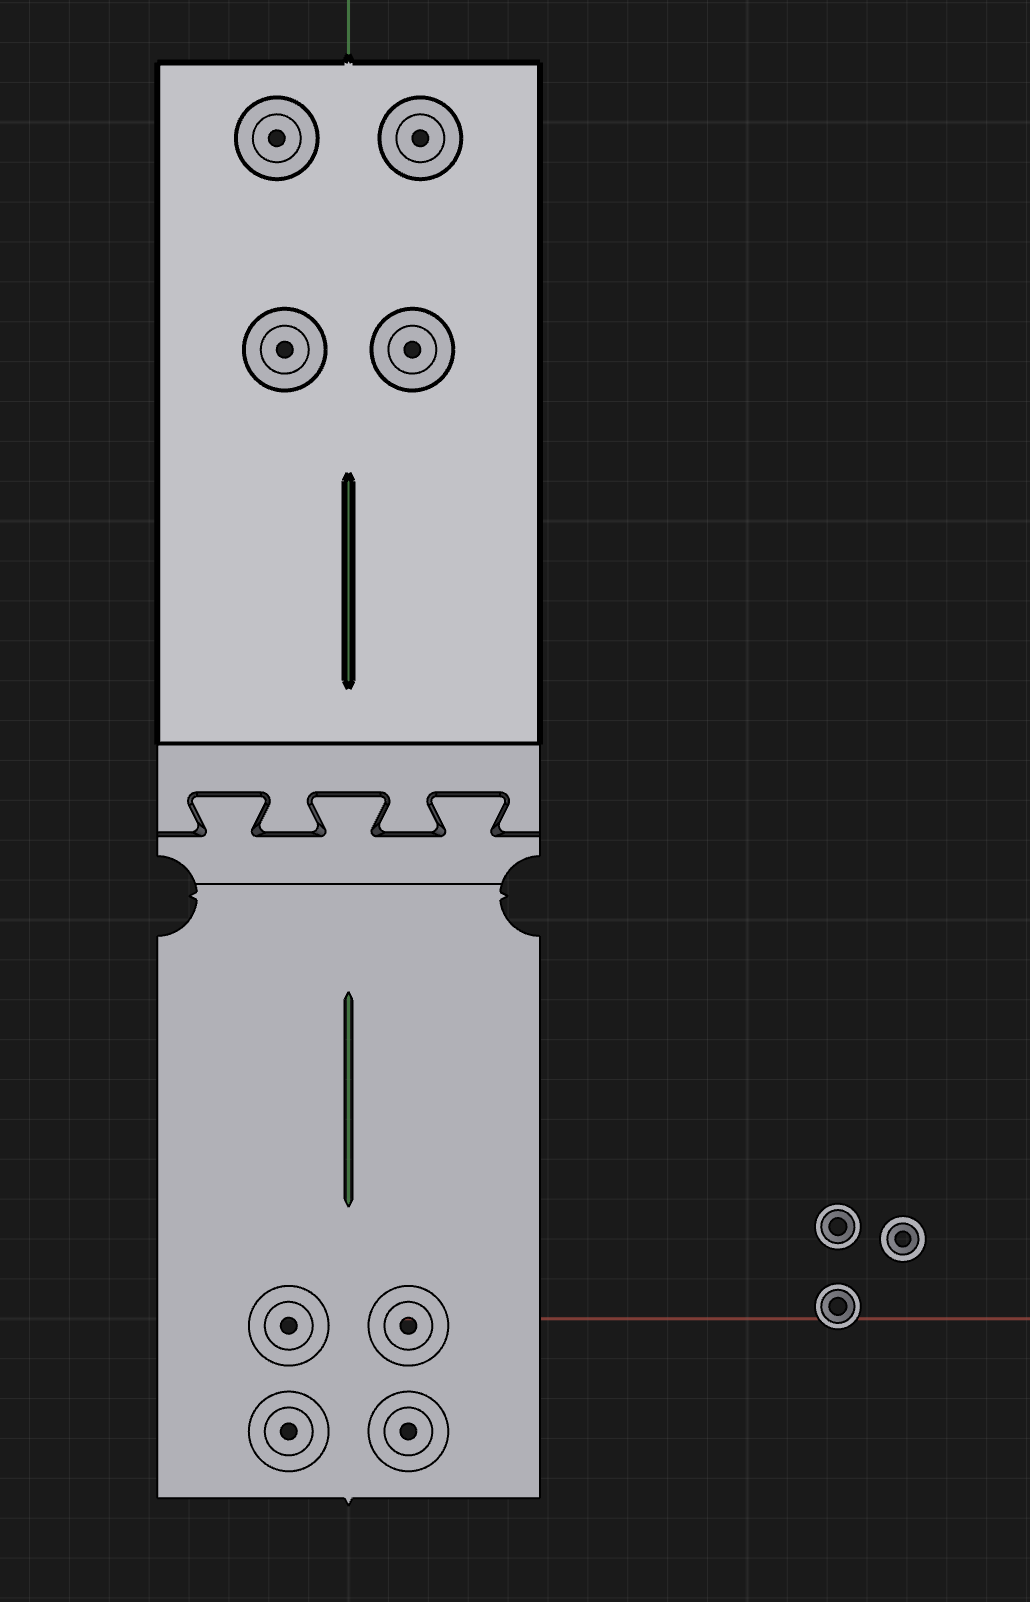
Finally, I included a horizontal and vertical midline marker on the model so that I could make sure the mounting holes were correctly centered on the ski.
When drilling holes, the horizontal midline should be lined up with the skis factory recommended mount line. If the jig model is designed correctly, this will ensure the midline of the boot lines up with the factory recommended mount line. Some skiers will prefer their boot bing slightly more to the front or back of the ski as opposed to factory recommended, which would needed to be considered in the model. (After testing the jig on a two-by-four, my jigs horizontal midline did not actually line up with the midline of my boot, so I had to shift the jig forward along the ski relative to the factory recommended mount line by about 0.5 cm.)
On the other hand, the vertical midline should be aligned with the center line of the ski to ensure your binding is not slightly off to the left or the right.
Drilling the Holes
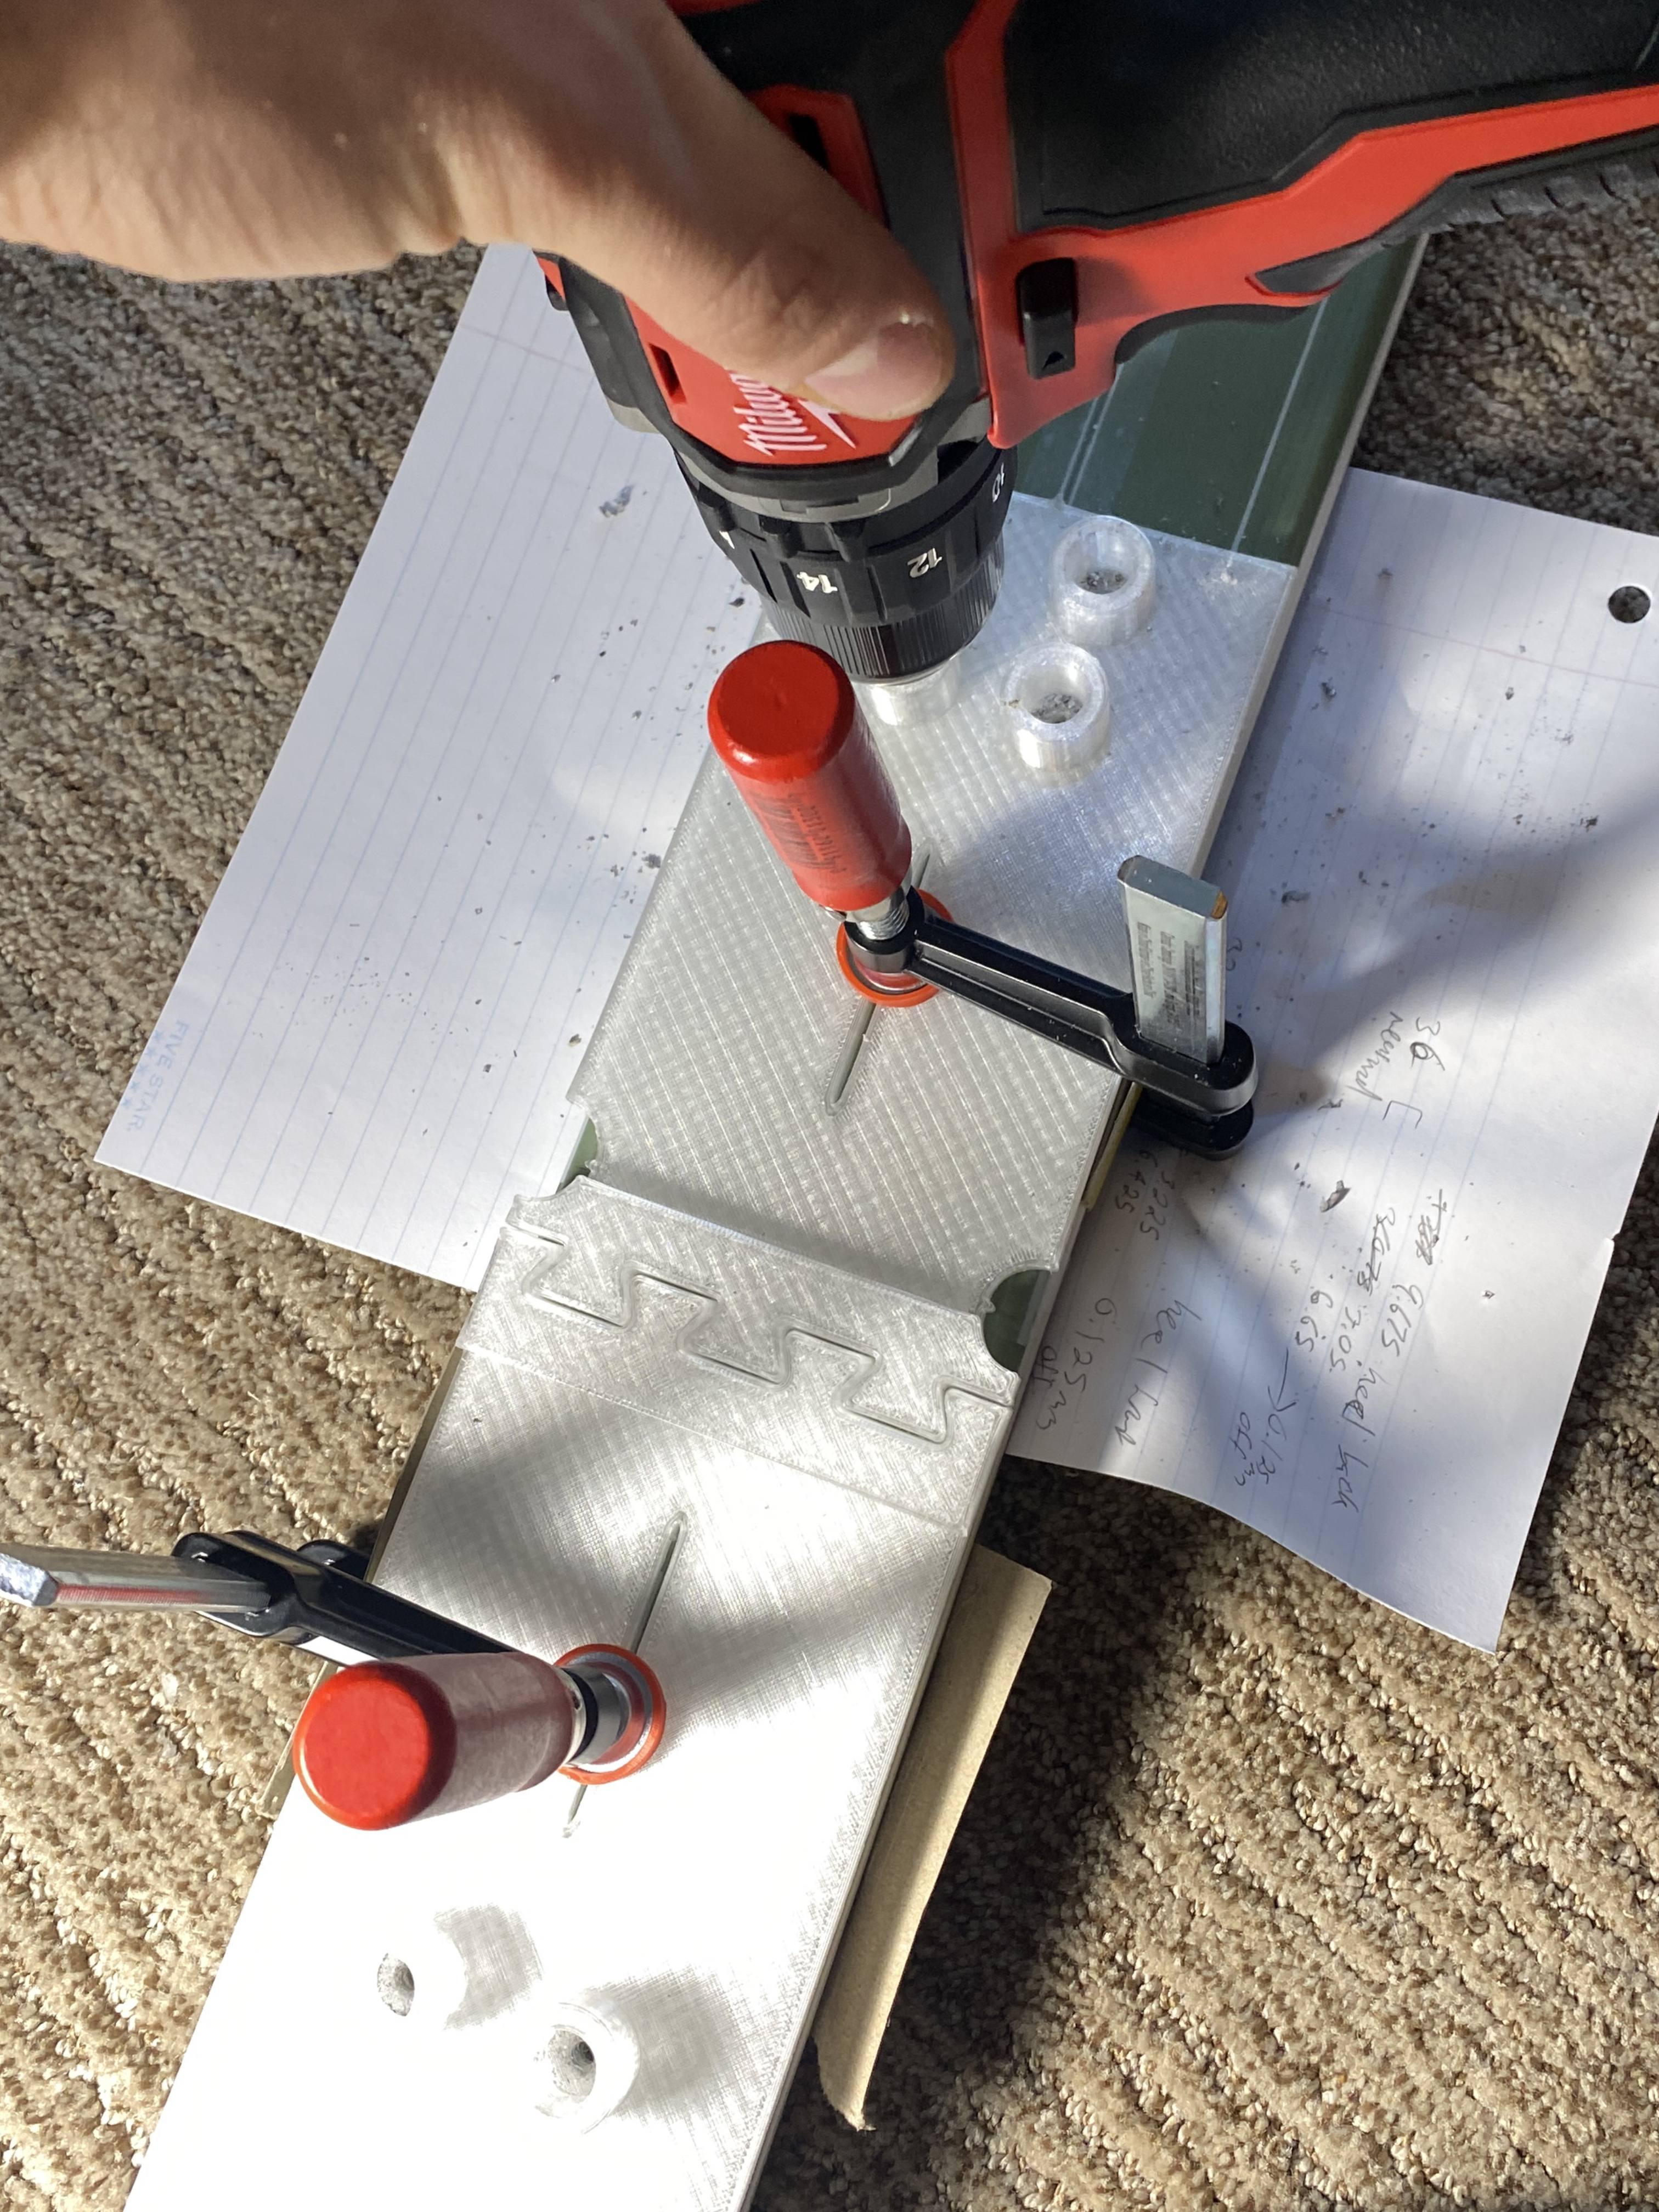
Prior to clamping the printed jig to the template, I made some very careful measurements with calipers in order to draw a vertical and horizontal midlines on strips of Scotch tape with a pencil and ruler. These are the lines that the midline markers of the jig will be aligned to. Of note, don’t trust any graphics on the ski top-sheet when drawing these midlines. My skis seemingly had two straight vertical lines that I could align my jig to, but they were actually 1 mm off-center from the skis true center.
After aligning and clamping down the jig, I used a fine-tip marker to draw out the location of each hole. I then removed the jig and placed the toe and heel binding piece on the ski to check the holes would be aligned correctly. To be extra sure, I measured the location of these marks relative to each other and to the ski edges.
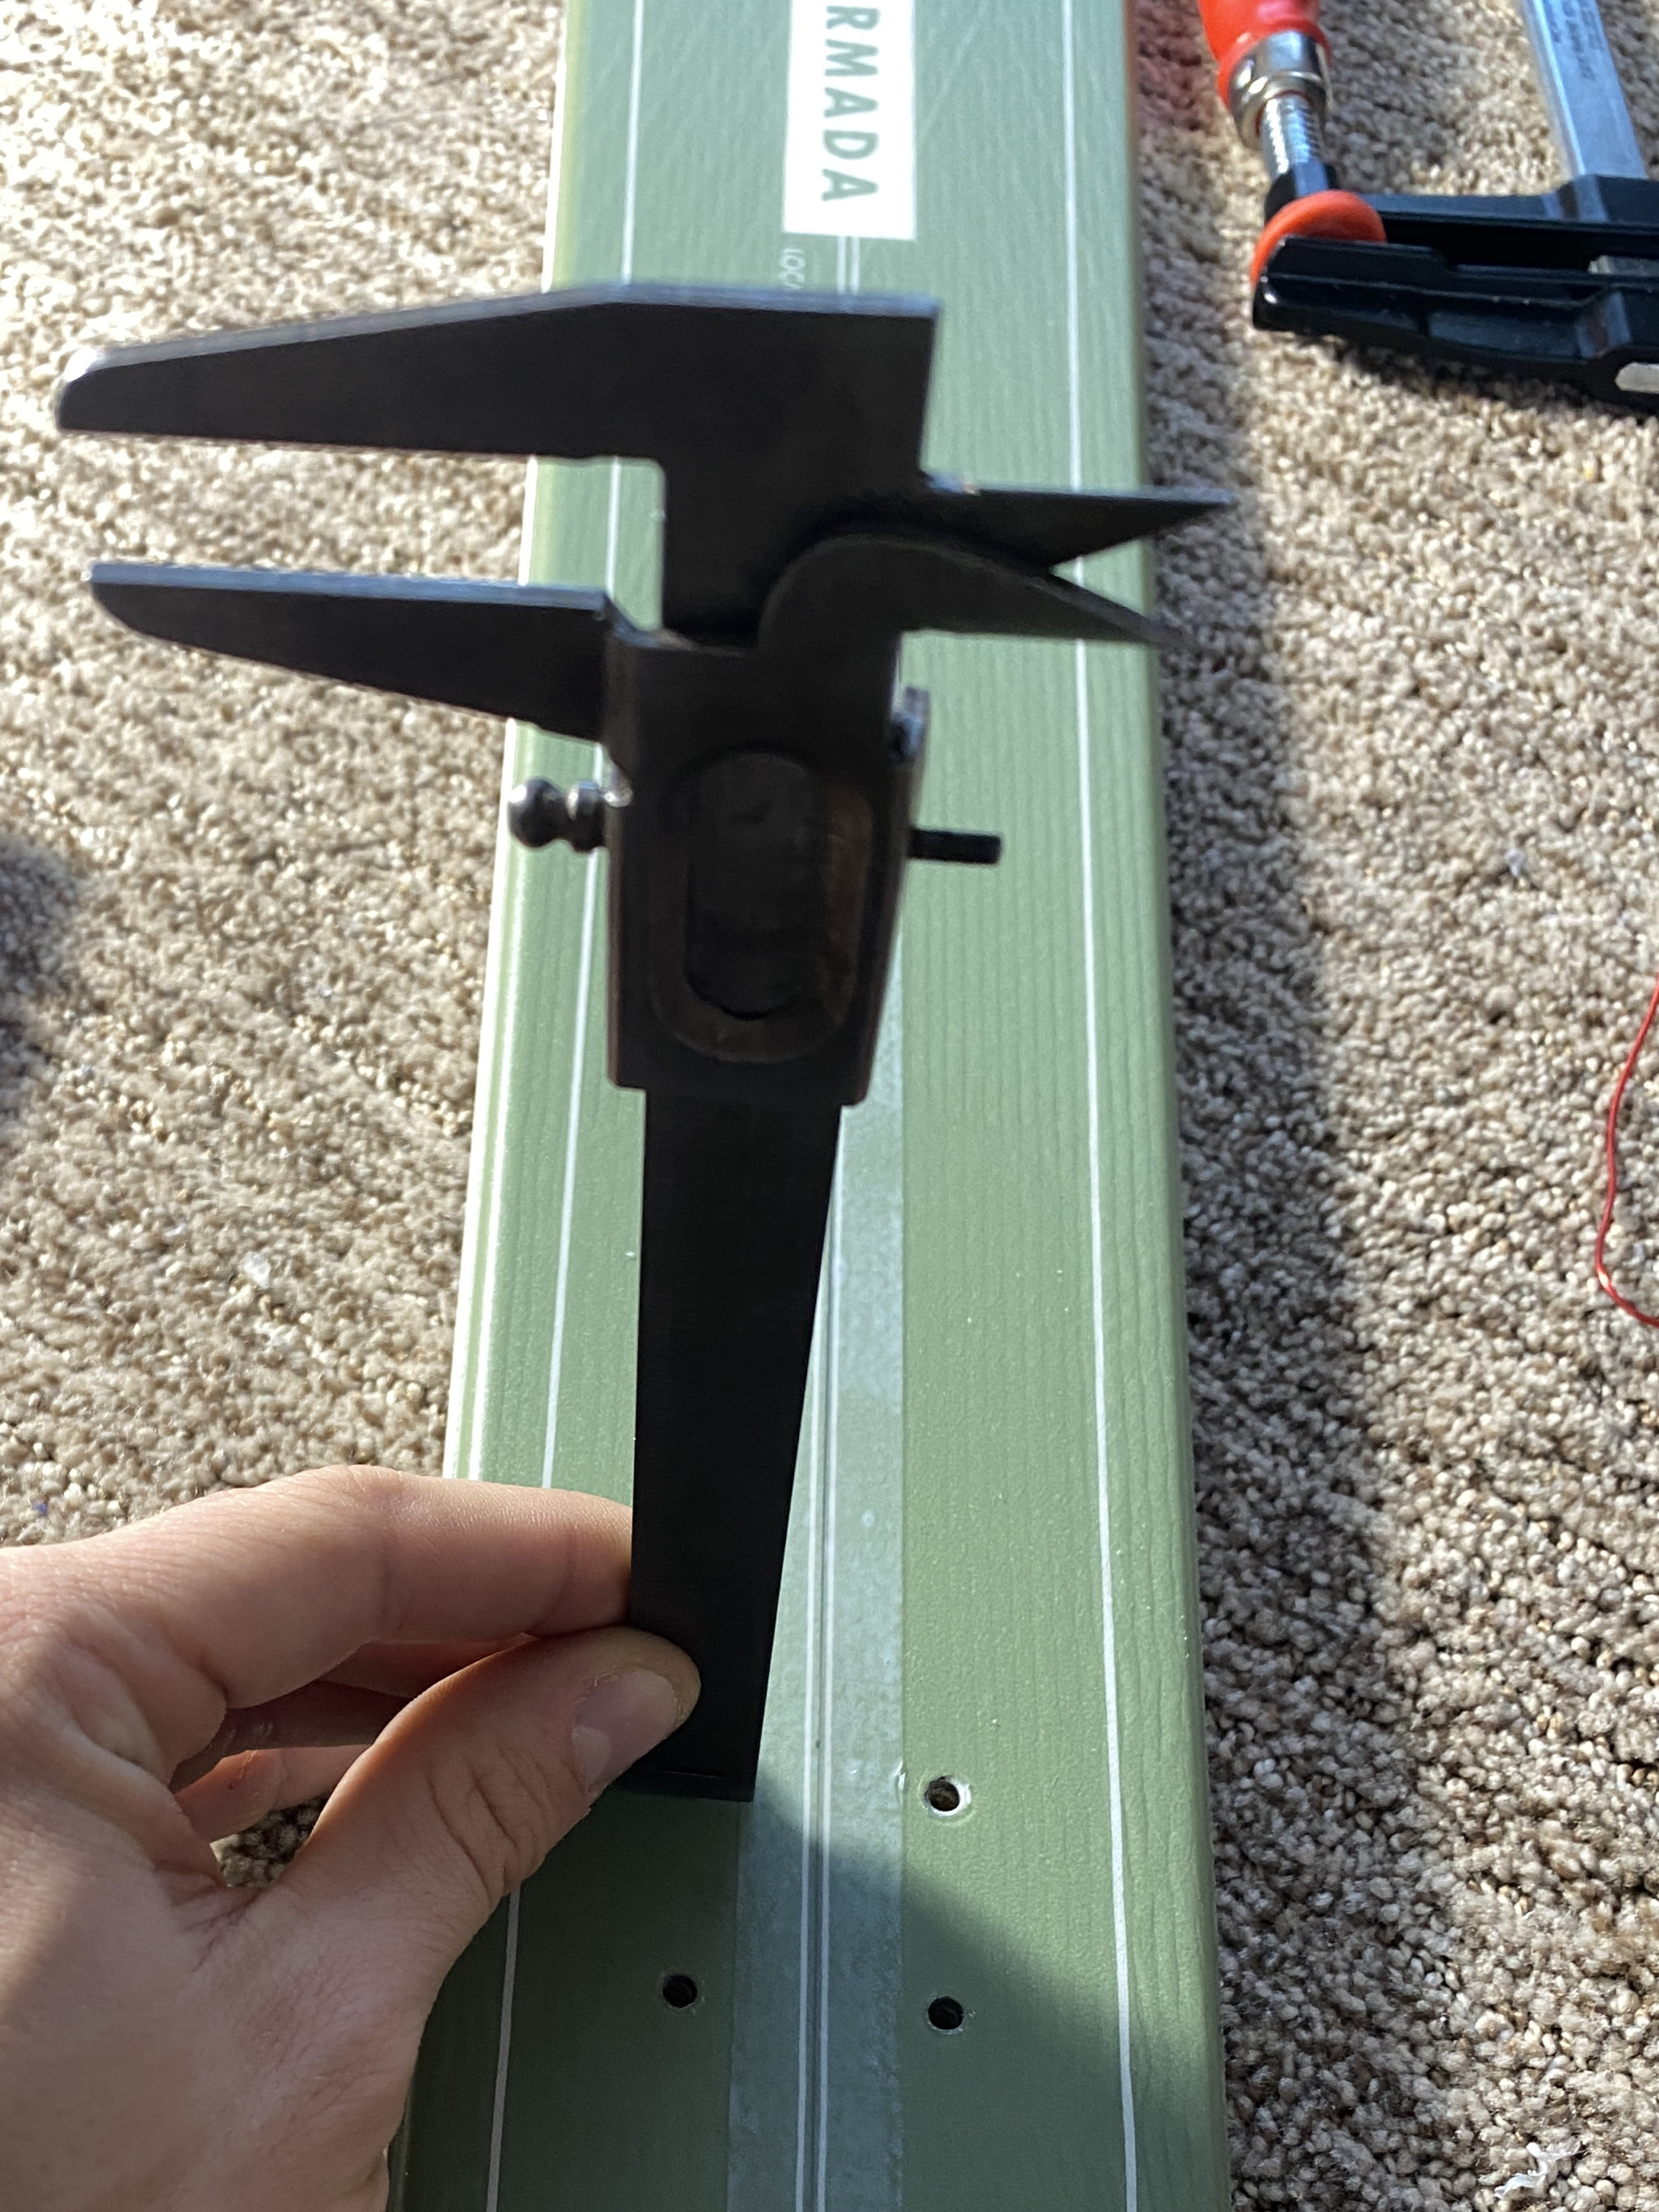
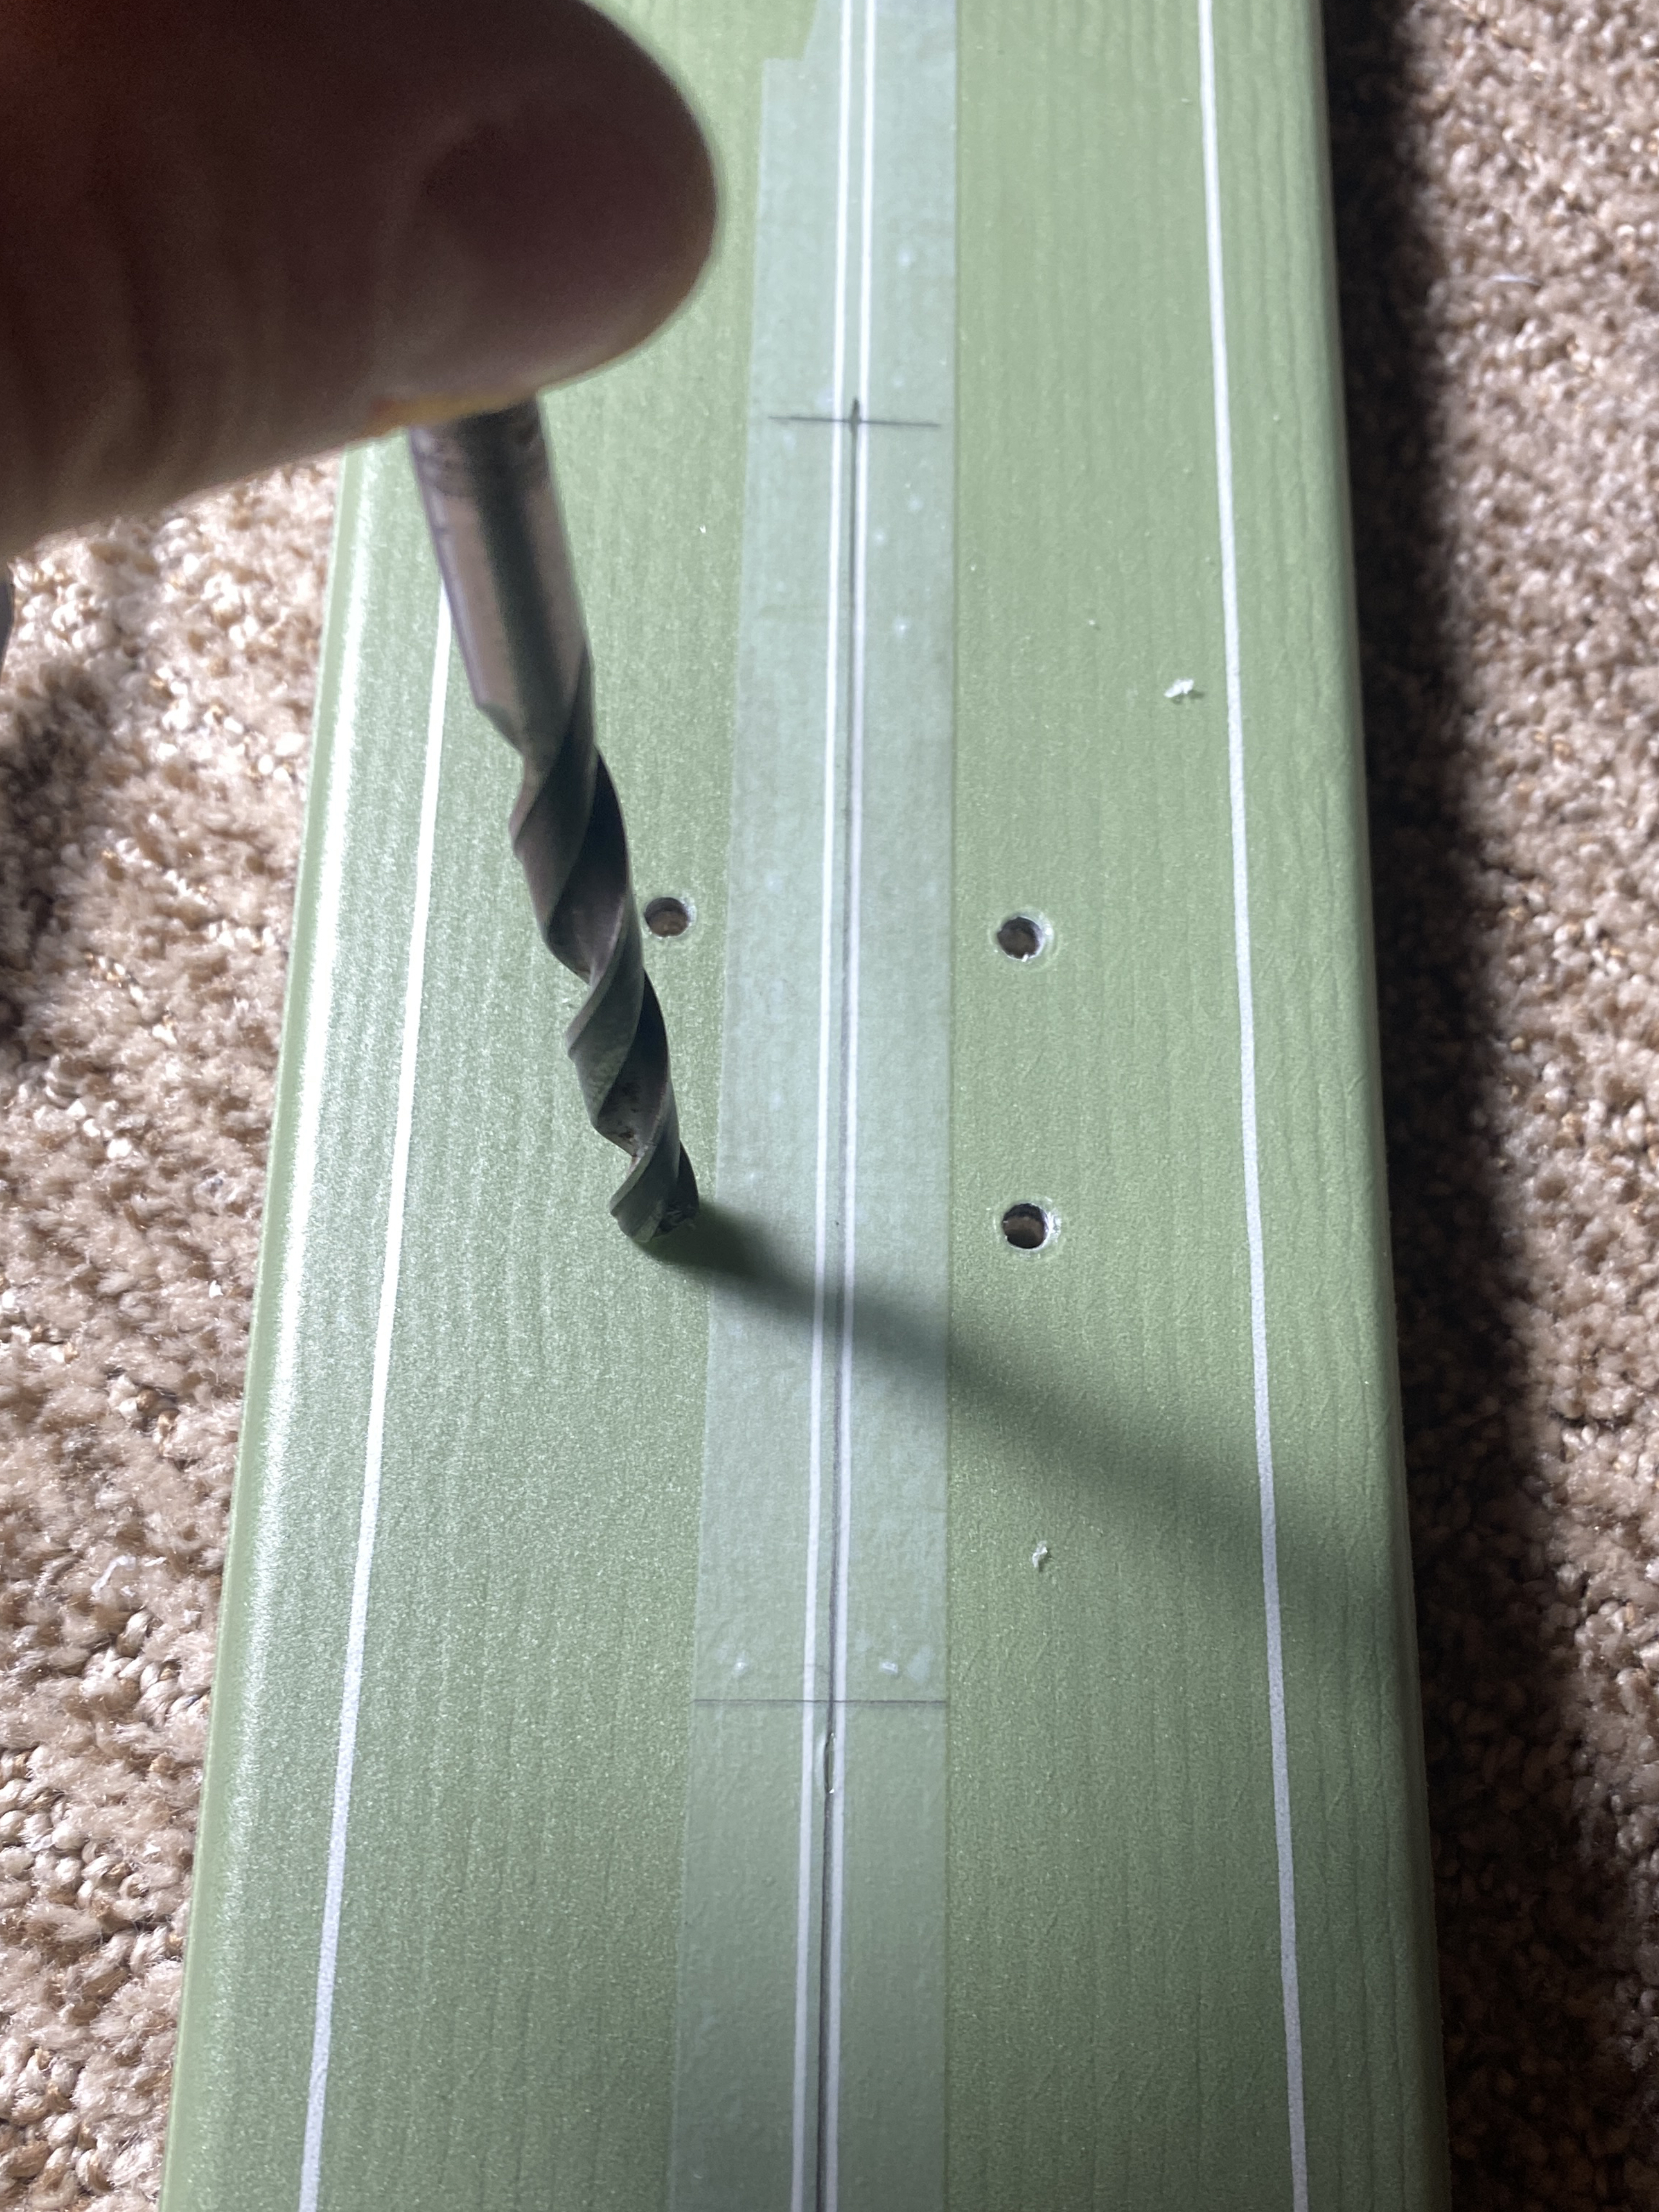
As a final sanity check before drilling, I placed the drill bit and depth stop correctly into a hole in the jig and then placed the jig offset onto the ski to compare the maximum drill depth to the height of the ski to ensure the drill bit would not pass through the ski, as seen below. Of course, before drilling the ski I also drilled into a two-by-four with the jig and measured the depth with a caliper to ensure the hole was 9.5 mm deep.

I re-clamped the jig to the skis (now aligned with both the marker shapes and the midlines), in preparation for drilling. First, I used a 9/64” (~3.6 mm) drill bit to drill a guide hole, which I found needed to punch through the metal titanal layer of the ski. I then went to the slightly larger 5/32” (~4.0 mm) drill bit to finish the hole, which was close enough to the ski manufacturers recommended 4.1 mm. After drilling this first hole, I took off the jig again and checked the hole quality and depth. I then re-aligned the jig and drilled all the remaining holes the same way.
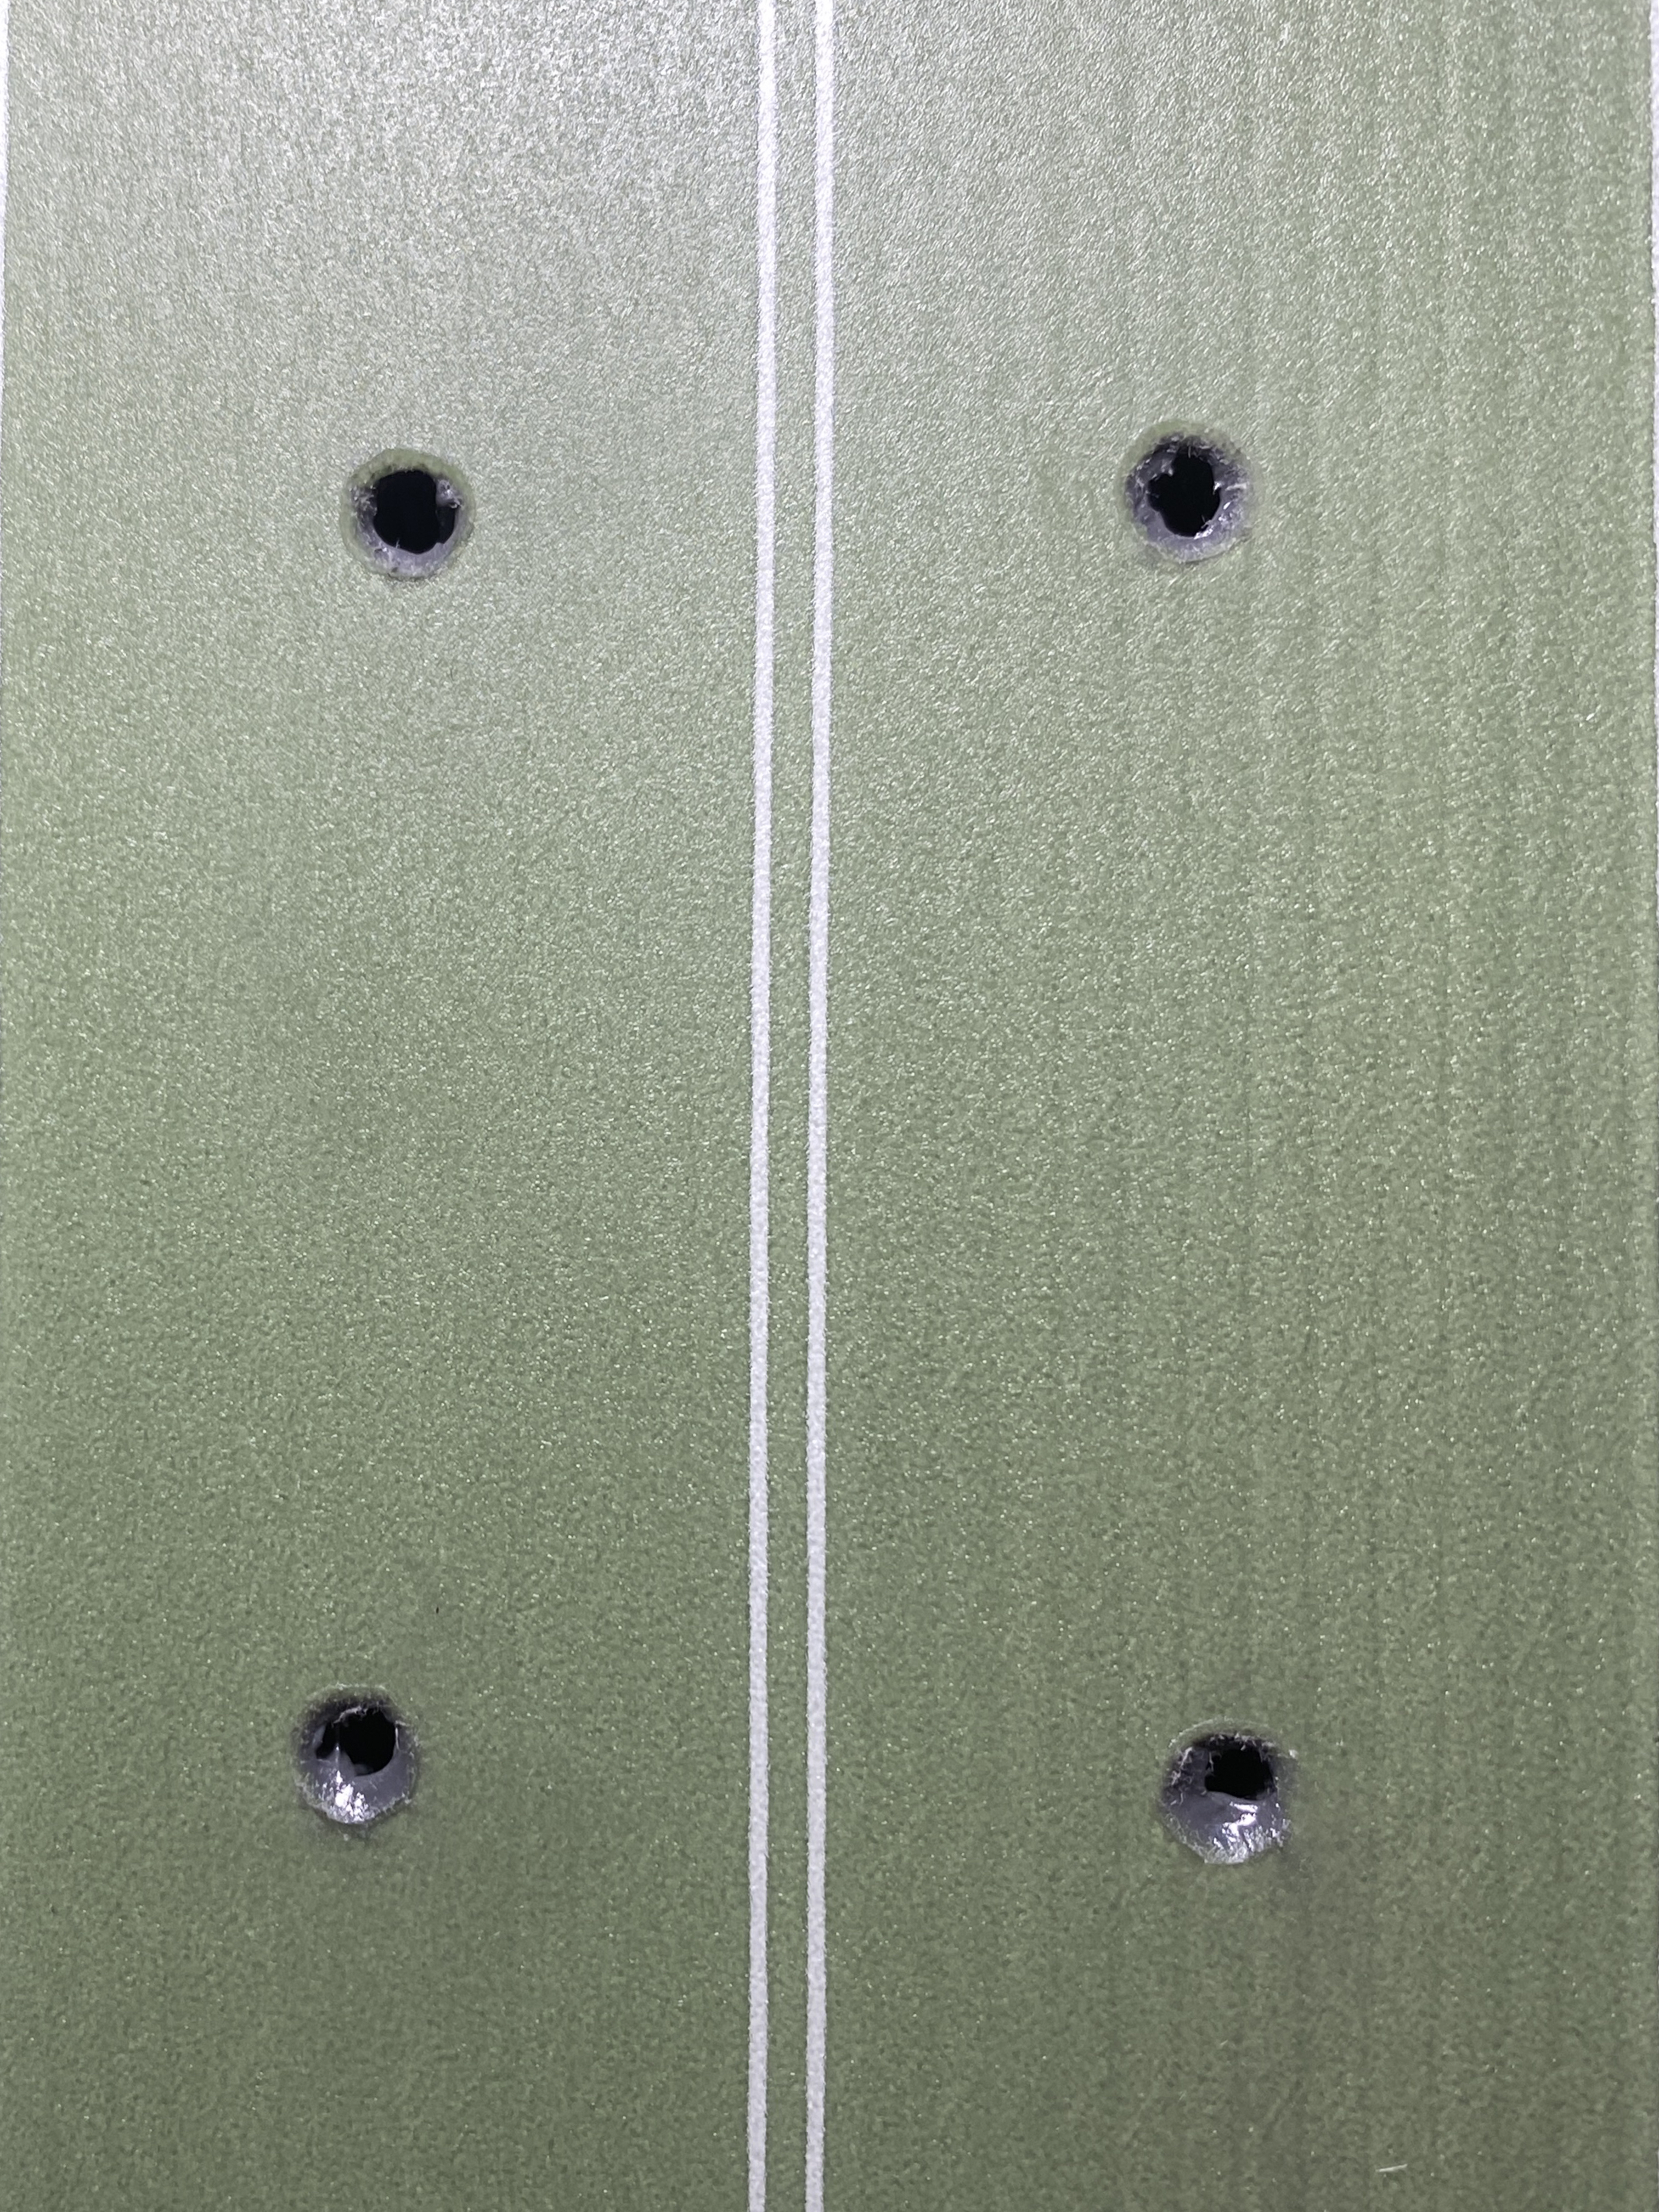
To clean up the holes and provide a little room for the material to expand as the binding screws are eventually screwed into the holes, I added a small countersink to each hole with a large drill bit by hand.
As a last step, I vacuumed out the holes of all the drill shavings.
Gluing the Holes
I decided to use epoxy in the binding holes as opposed to a waterproof wood glue. The primary purpose of such adhesives is to create a waterproof barrier to prevent water from getting into the ski core which could eventually cause rot. Wood glue creates this barrier while making removal of the bindings easier compared to epoxy. However, since I do not intend on moving or replacing my bindings, I chose to use epoxy for its strength benefits in adhering the screw to the ski core. Marine epoxy is ideal because it is waterproof, and I confirmed with the ski manufacturer that the J-B Weld variant would be a good choice.
After mixing the two-part epoxy, I pushed some into the holes, and spread it around the entire hole surface with a toothpick. Finally, I cleaned up the excess epoxy from the ski top-sheet.
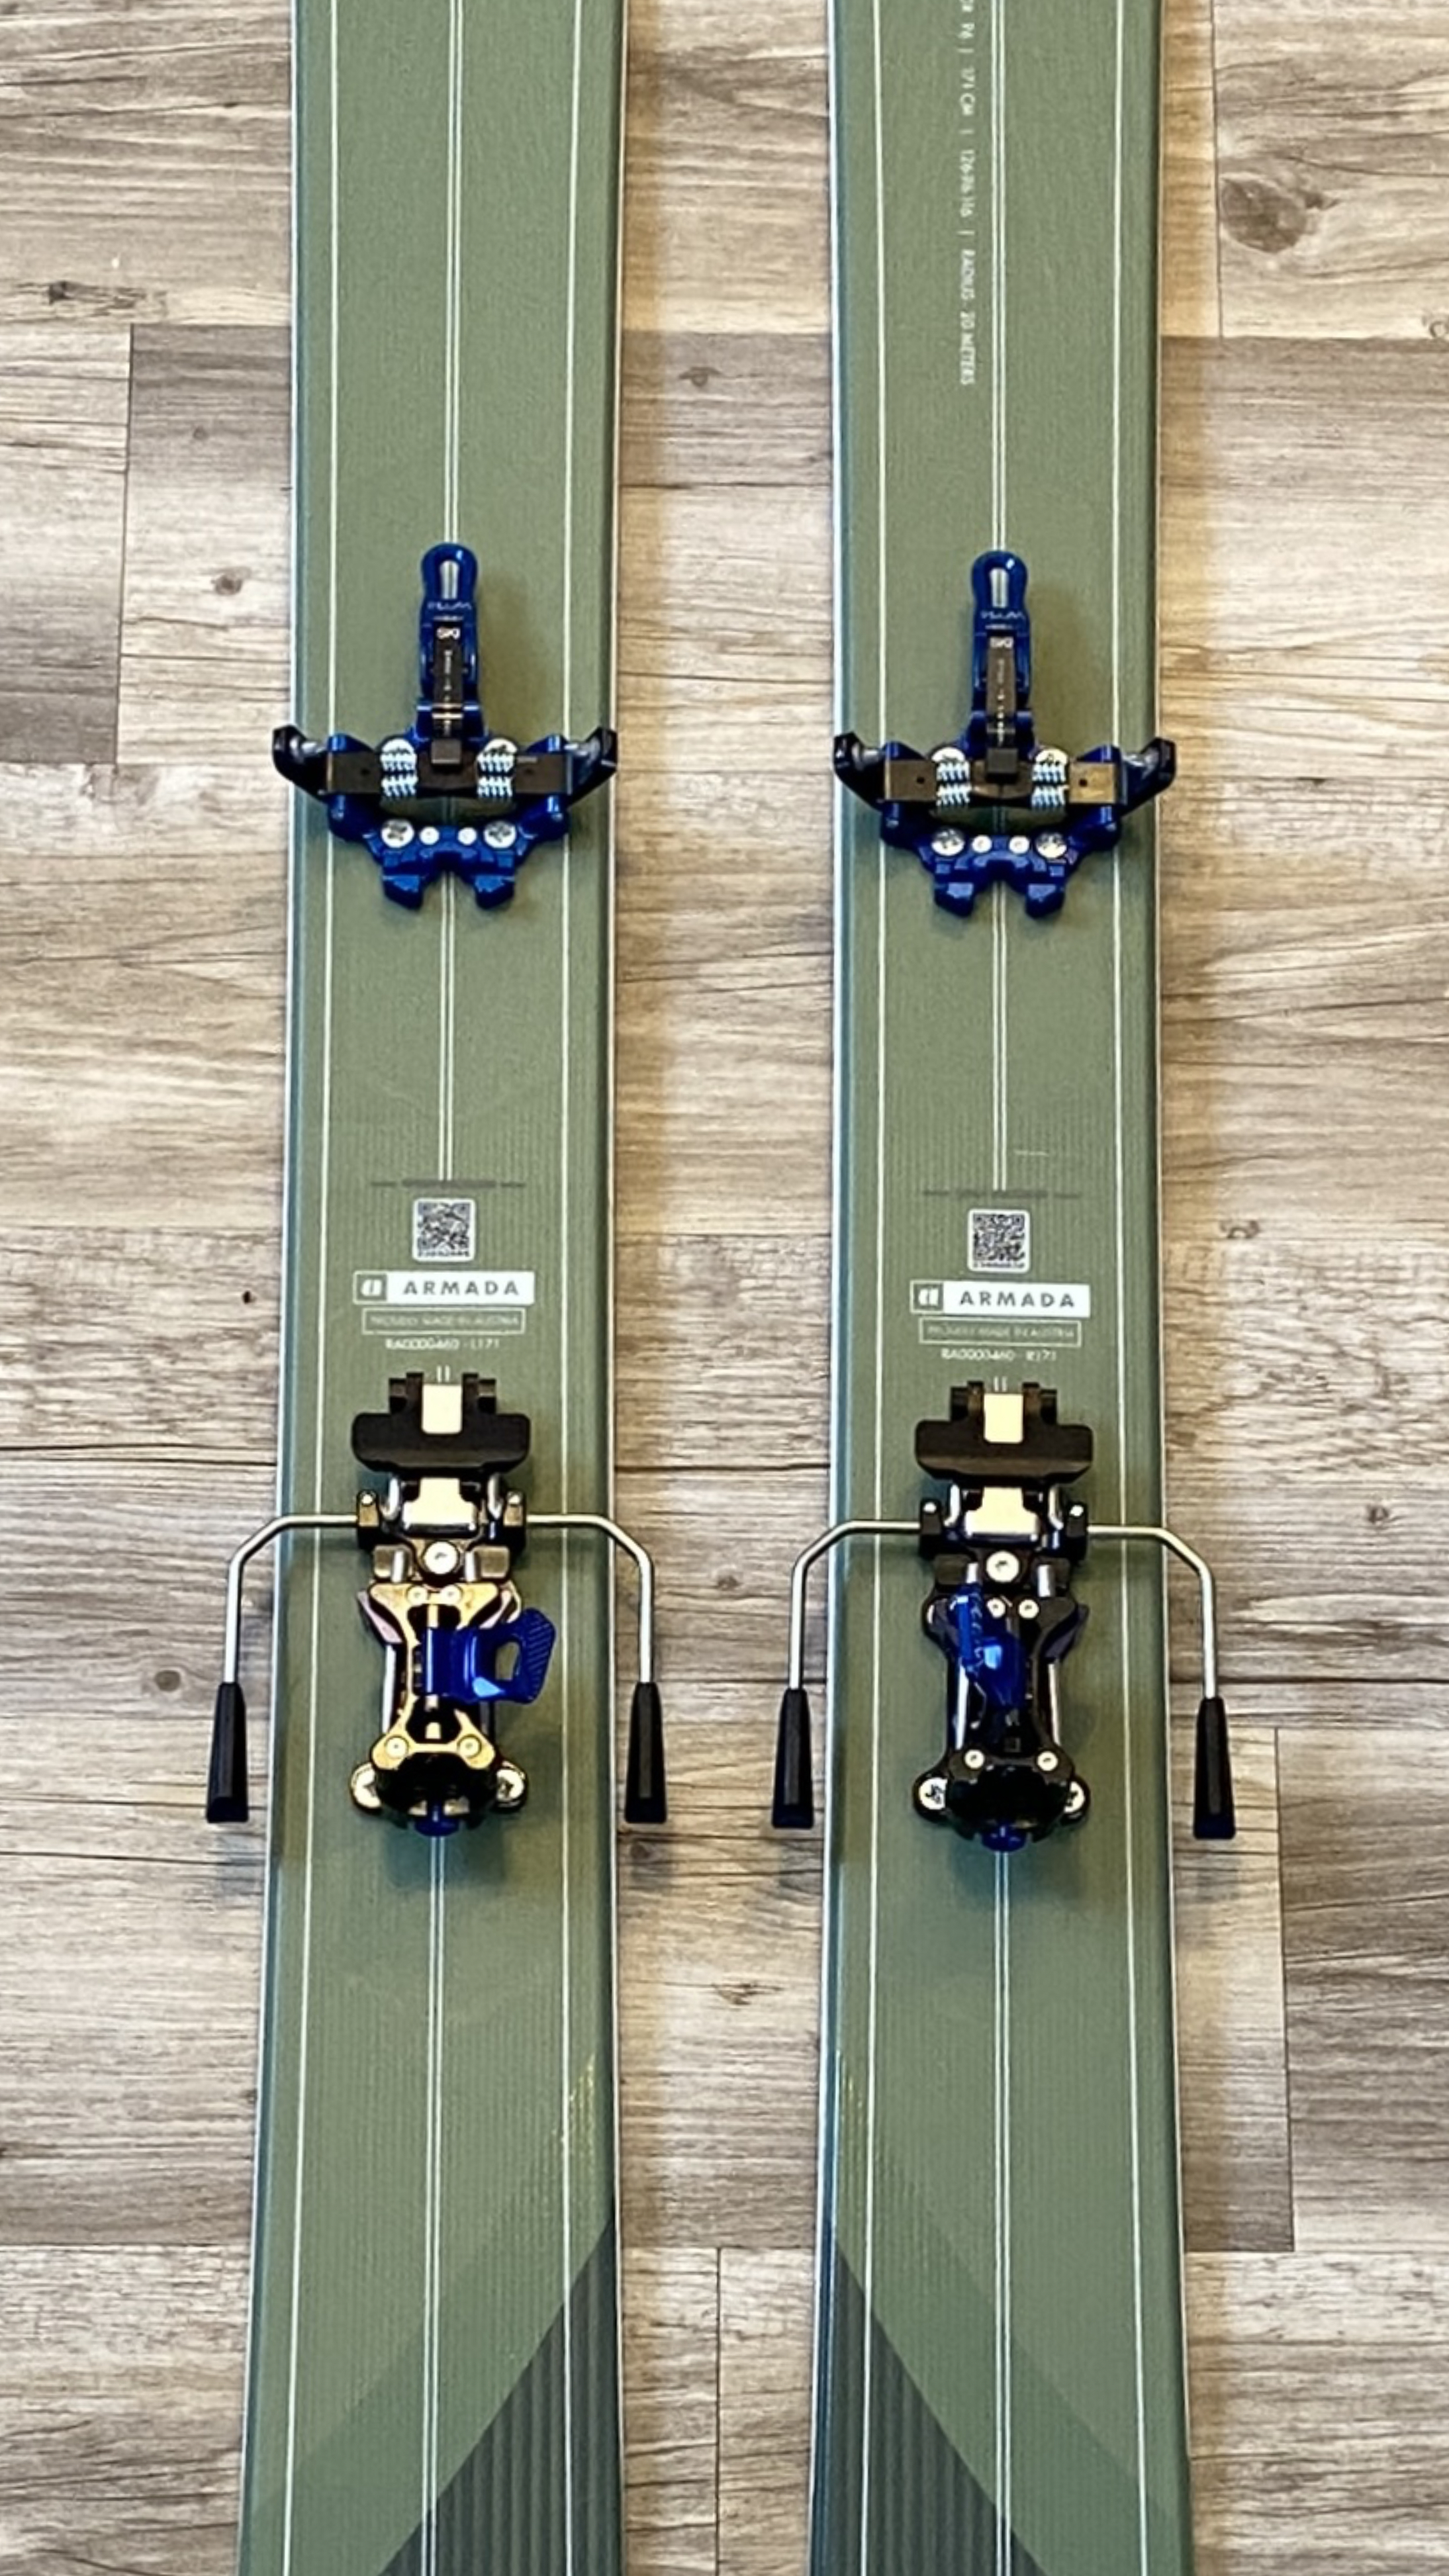
Screwing the Bindings
With all the holes prepared, I could start screwing in the binding screws. Of note, I decided against using a tap to prepare threads in the titanal layer for the screw. A special tap is required for ski binding screwsm which I only could find online. While the ski manufacturer recommended tapping holes, I talked to a couple ski shops which indicated the typically do not tap.
After aligning the binding pieces to the holes, I begin screwing in the screws. Using a Pozidriv #3 screwdriver head is ideal to prevent stripping the screw heads. Even though the screws may look like a Philips head, they are not.
While screwing, I applied a strong downward force on the screwdriver to ensure the screw was driven into the material, as opposed to the screw pulling the layers of the material up, which would create an undesirable “volcano” hole, preventing the binding from sitting flat to the ski top-sheet.
I gradually screwed in the screws following a “star”-pattern, similar to a car tire. Before fully tight, while there was still some play in the toe and heel binding piece, I clipped in the toe of one ski boot to the toe binding and made sure that the rear contact point of the boot touched the two metal rods of the rear binding at the same time. Once aligned, I tightened the screws.
I was careful not to over tighten the screws as this would result in a screw destroying the threads it made, which would allow the screw to spin freely, ultimately wrecking the mount. I tightened until the screw stopped turing with “moderate” force, and then tightened a touch more. This is admittedly qualitative. I made sure that each screw was the same qualitative level of tightness, since tightening one could allow tightening another.
With the mount complete, the epoxy needs to cure for (at least) a day before using the skis.
Waxing the Skis – Bonus
I found my skis were not sufficiently waxed straight from the factory, so I did this myself. While there is a lot of information on this process online, I wanted to give a few tips.
First, I found a normal clothes iron to work great, but I used tinfoil over the iron surface to prevent wax from filling the iron holes. I used the “cotton-blend” heat for applying the ski wax.
To scrape the wax, I also did not use any ski-specific tools. I found a thick metal carpentry ruler worked well to scrape off the wax from head to toe along the length of the ski. I found it essential to keep the ruler clean of any wax, otherwise it would fail to scrape off additional wax. I also found it helpful to flex the ruler such that there was a slight convex edge contacting the ski. This allowed me some control over which portion of the ski was being scraped, allowing the entire surface to be scaped.
Finally, I brushed off the wax using a cheap household cleaning brush with firm plastic bristles.
Boot Dye – Bonus
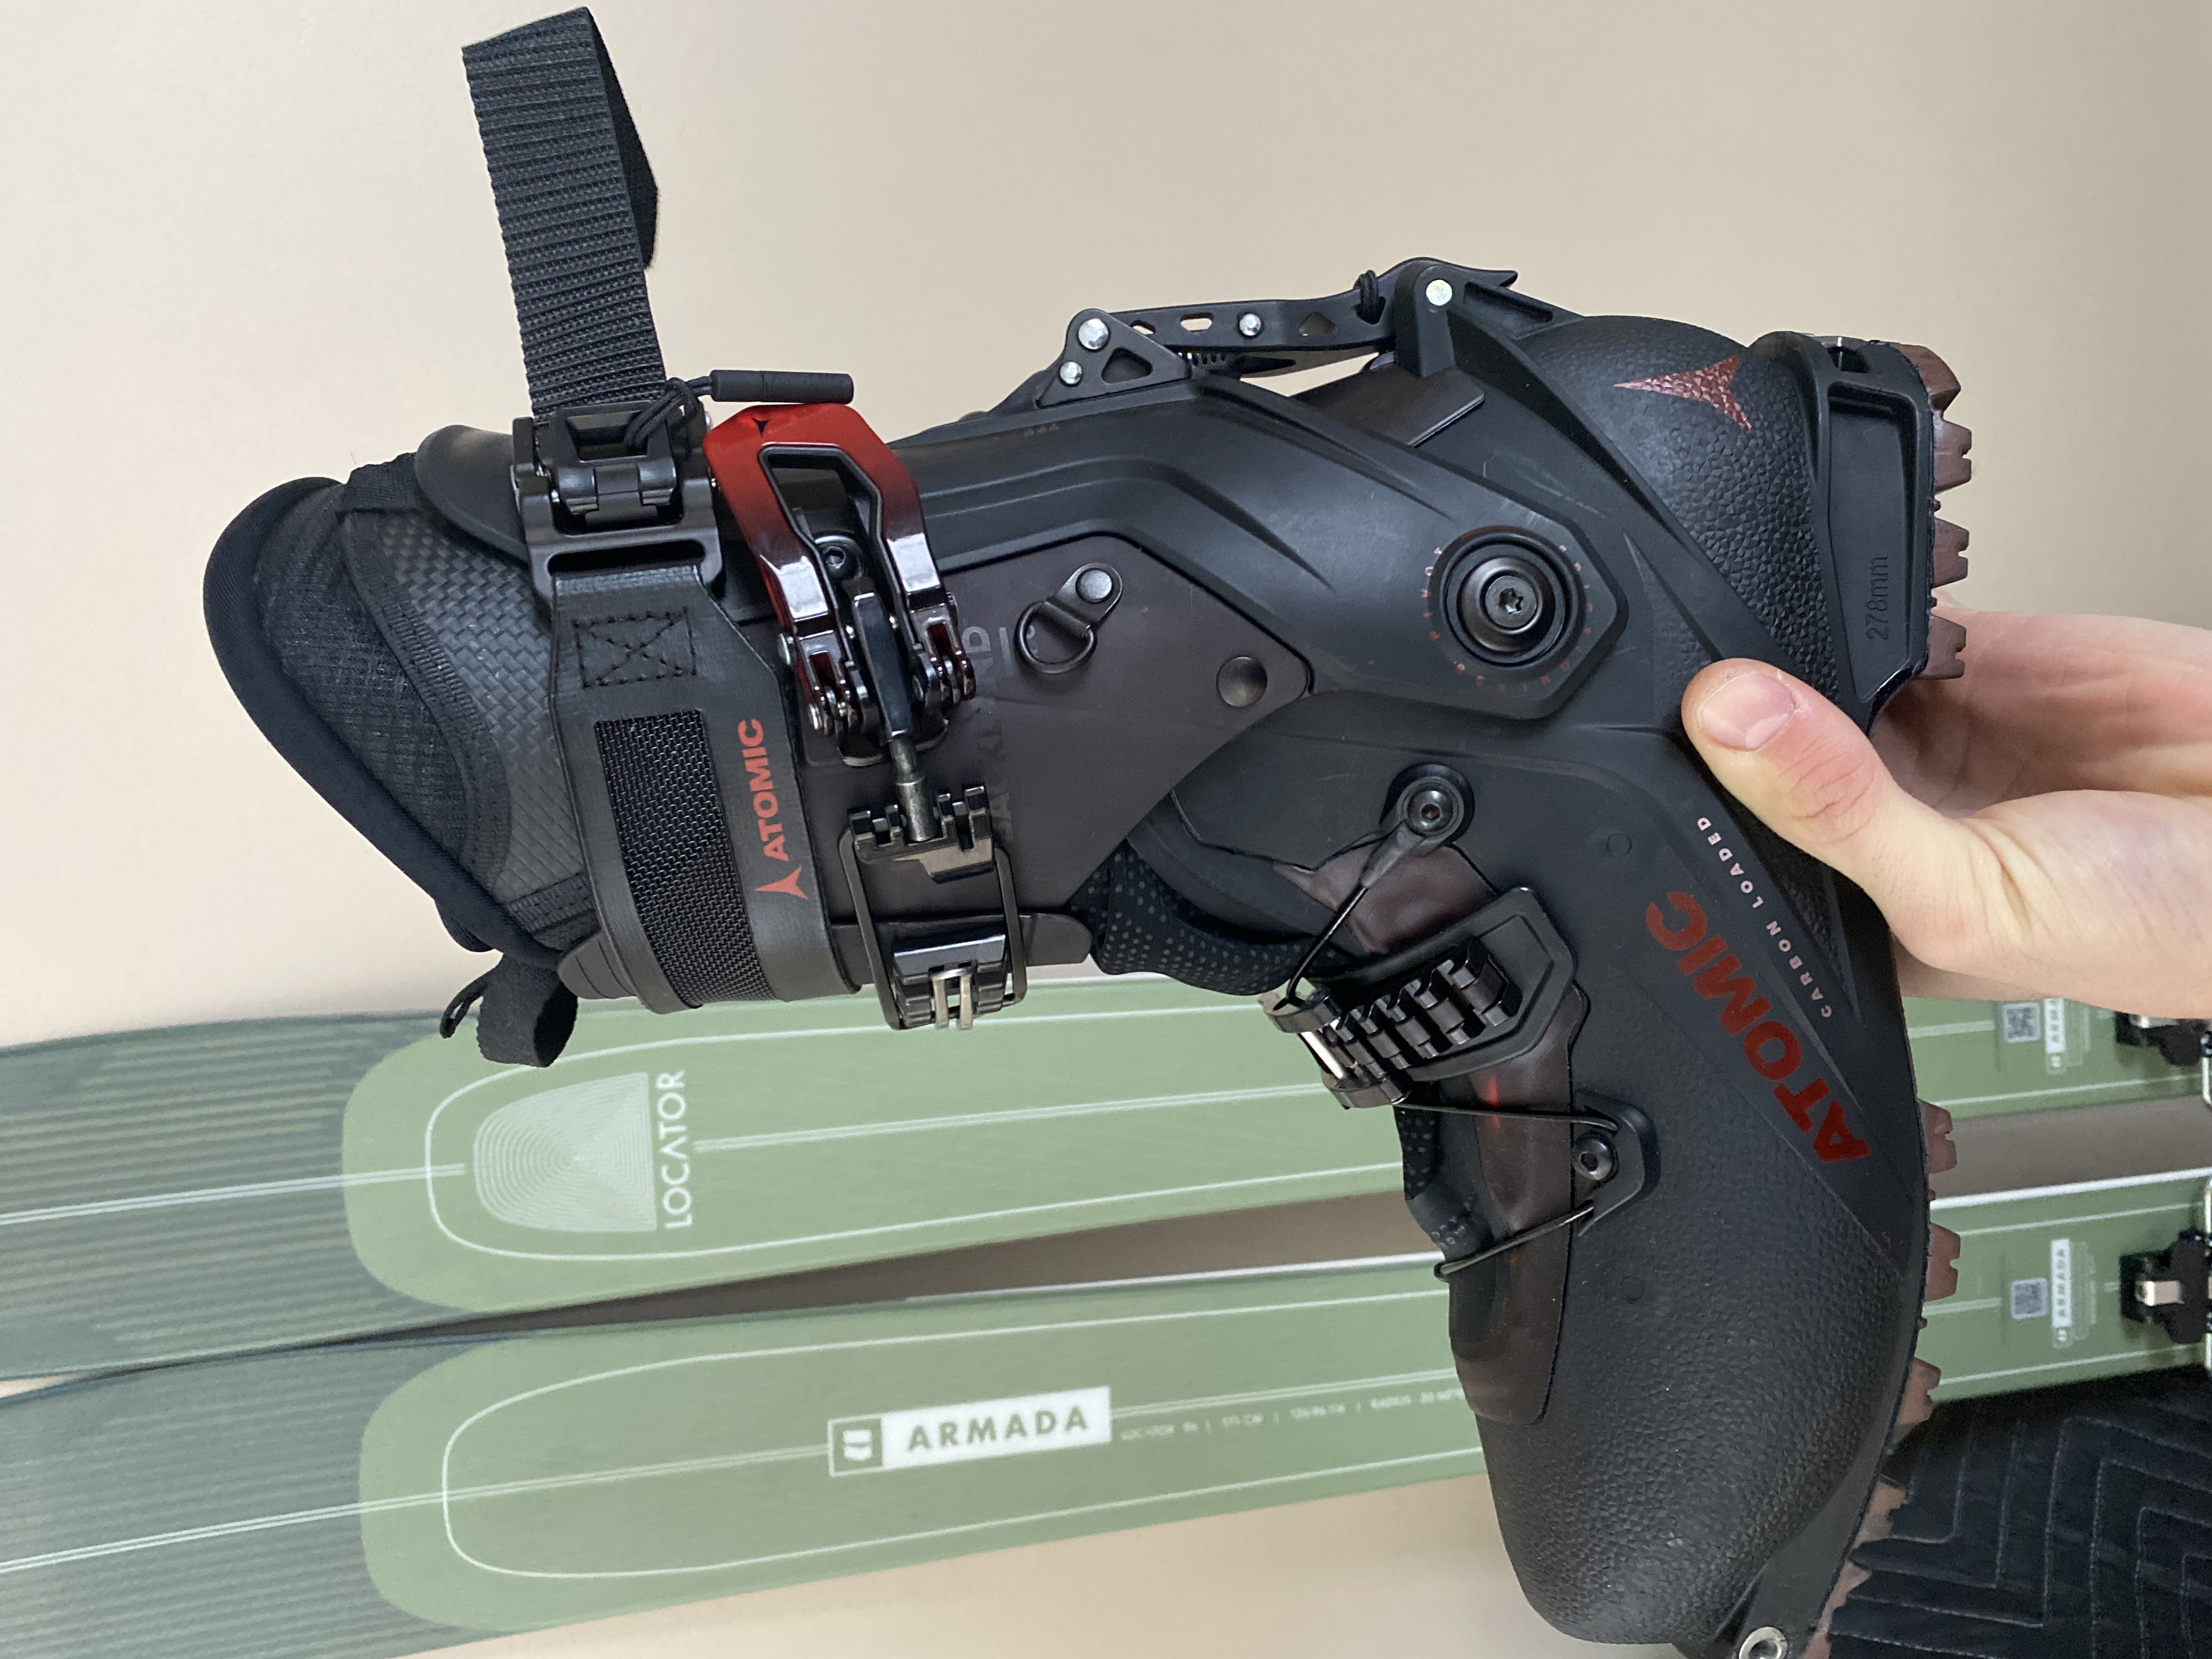
The boots I bought were a little too colorful for my liking, so I dyed them with the graphite color of Rit DyeMore synthetic dye. I simply removed the liner from the boots, boiled enough water to submerge the boots, then let the boot shells sit in the near-boiling water and dye mixture for a few hours. A few rinses in cool water to remove excess dye and the boots were good to go.